From floor plan
to 3D render
Every step from uploading your first floor plan to exporting a photorealistic render — with real screenshots from inside the app.
Upload Your Floor Plan
Click the upload button and drop in any 2D floor plan — a photo, scanned PDF, CAD export, or even a hand sketch. Strukt AI accepts JPG, PNG, PDF, and DWG. No clean linework needed; the AI corrects blurry or imperfect scans automatically.

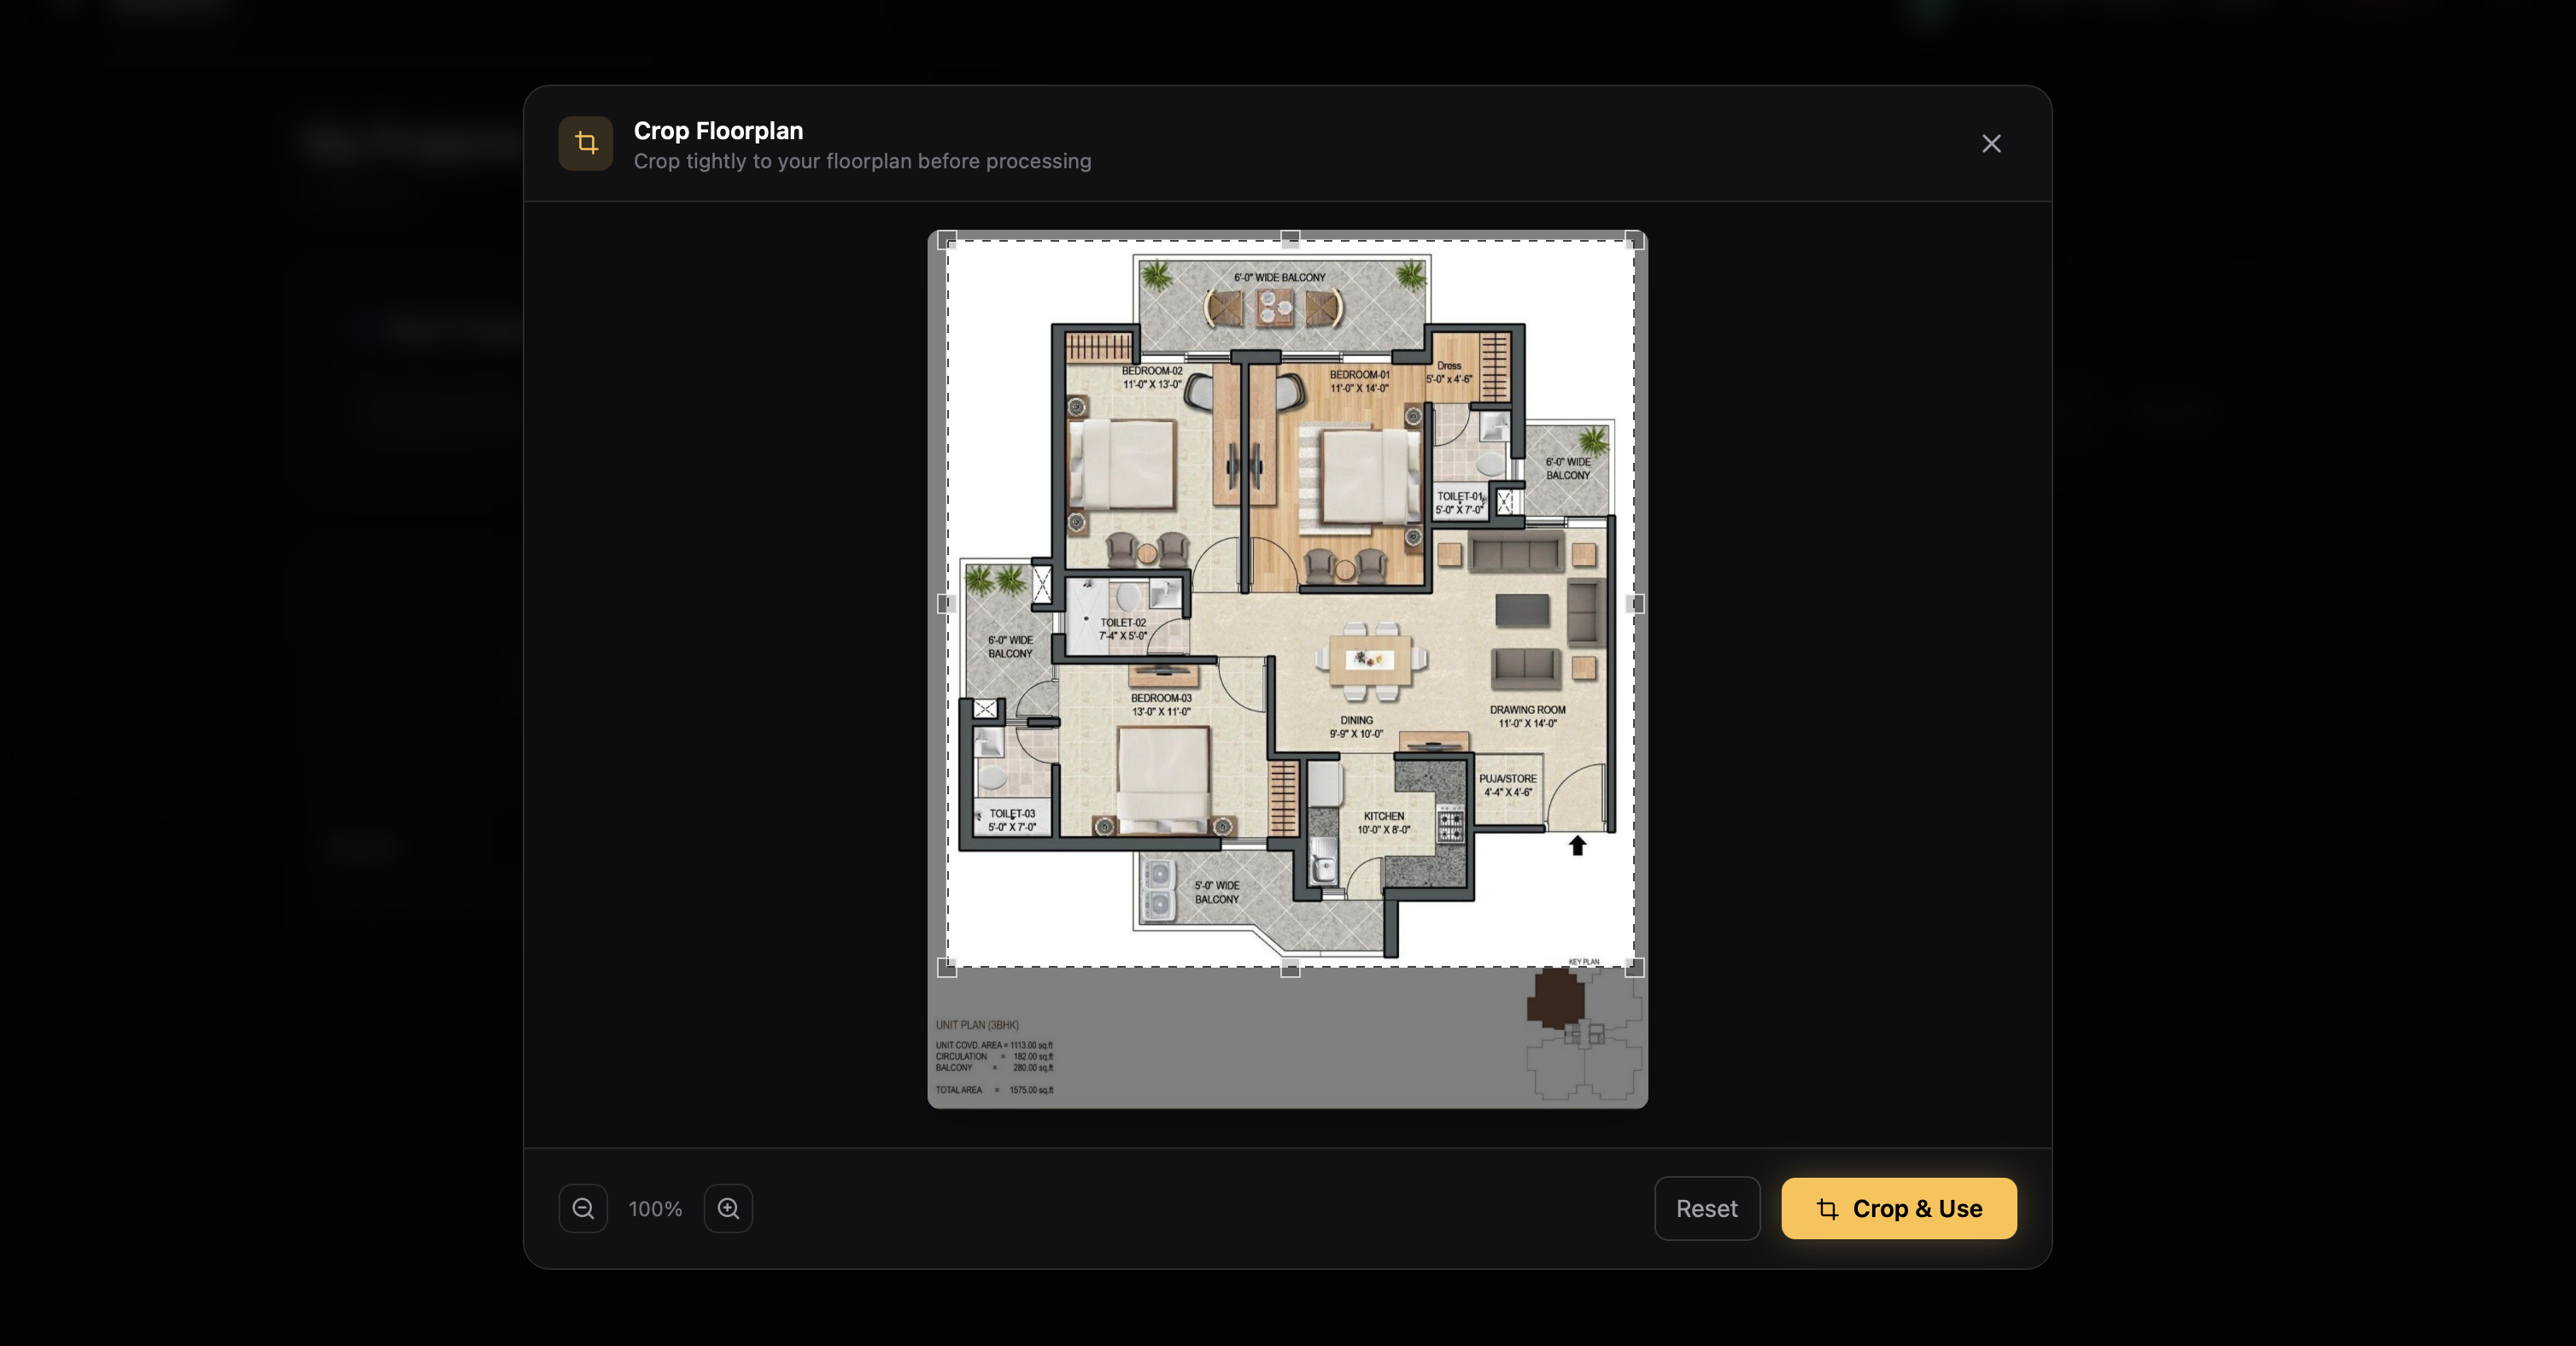
Crop to Your Floor Plan
After uploading, a crop tool lets you trim the image to just the floor plan area. Remove any surrounding white space, title blocks, or legends so the AI focuses only on the geometry. You can skip this step if your image is already well-framed.
Run Inference
Hit the Process button to start the AI inference. The spatial engine reads the floor plan, detects every wall, door, window, and room boundary, then converts them into an editable SVG. Processing typically finishes in under 60 seconds.
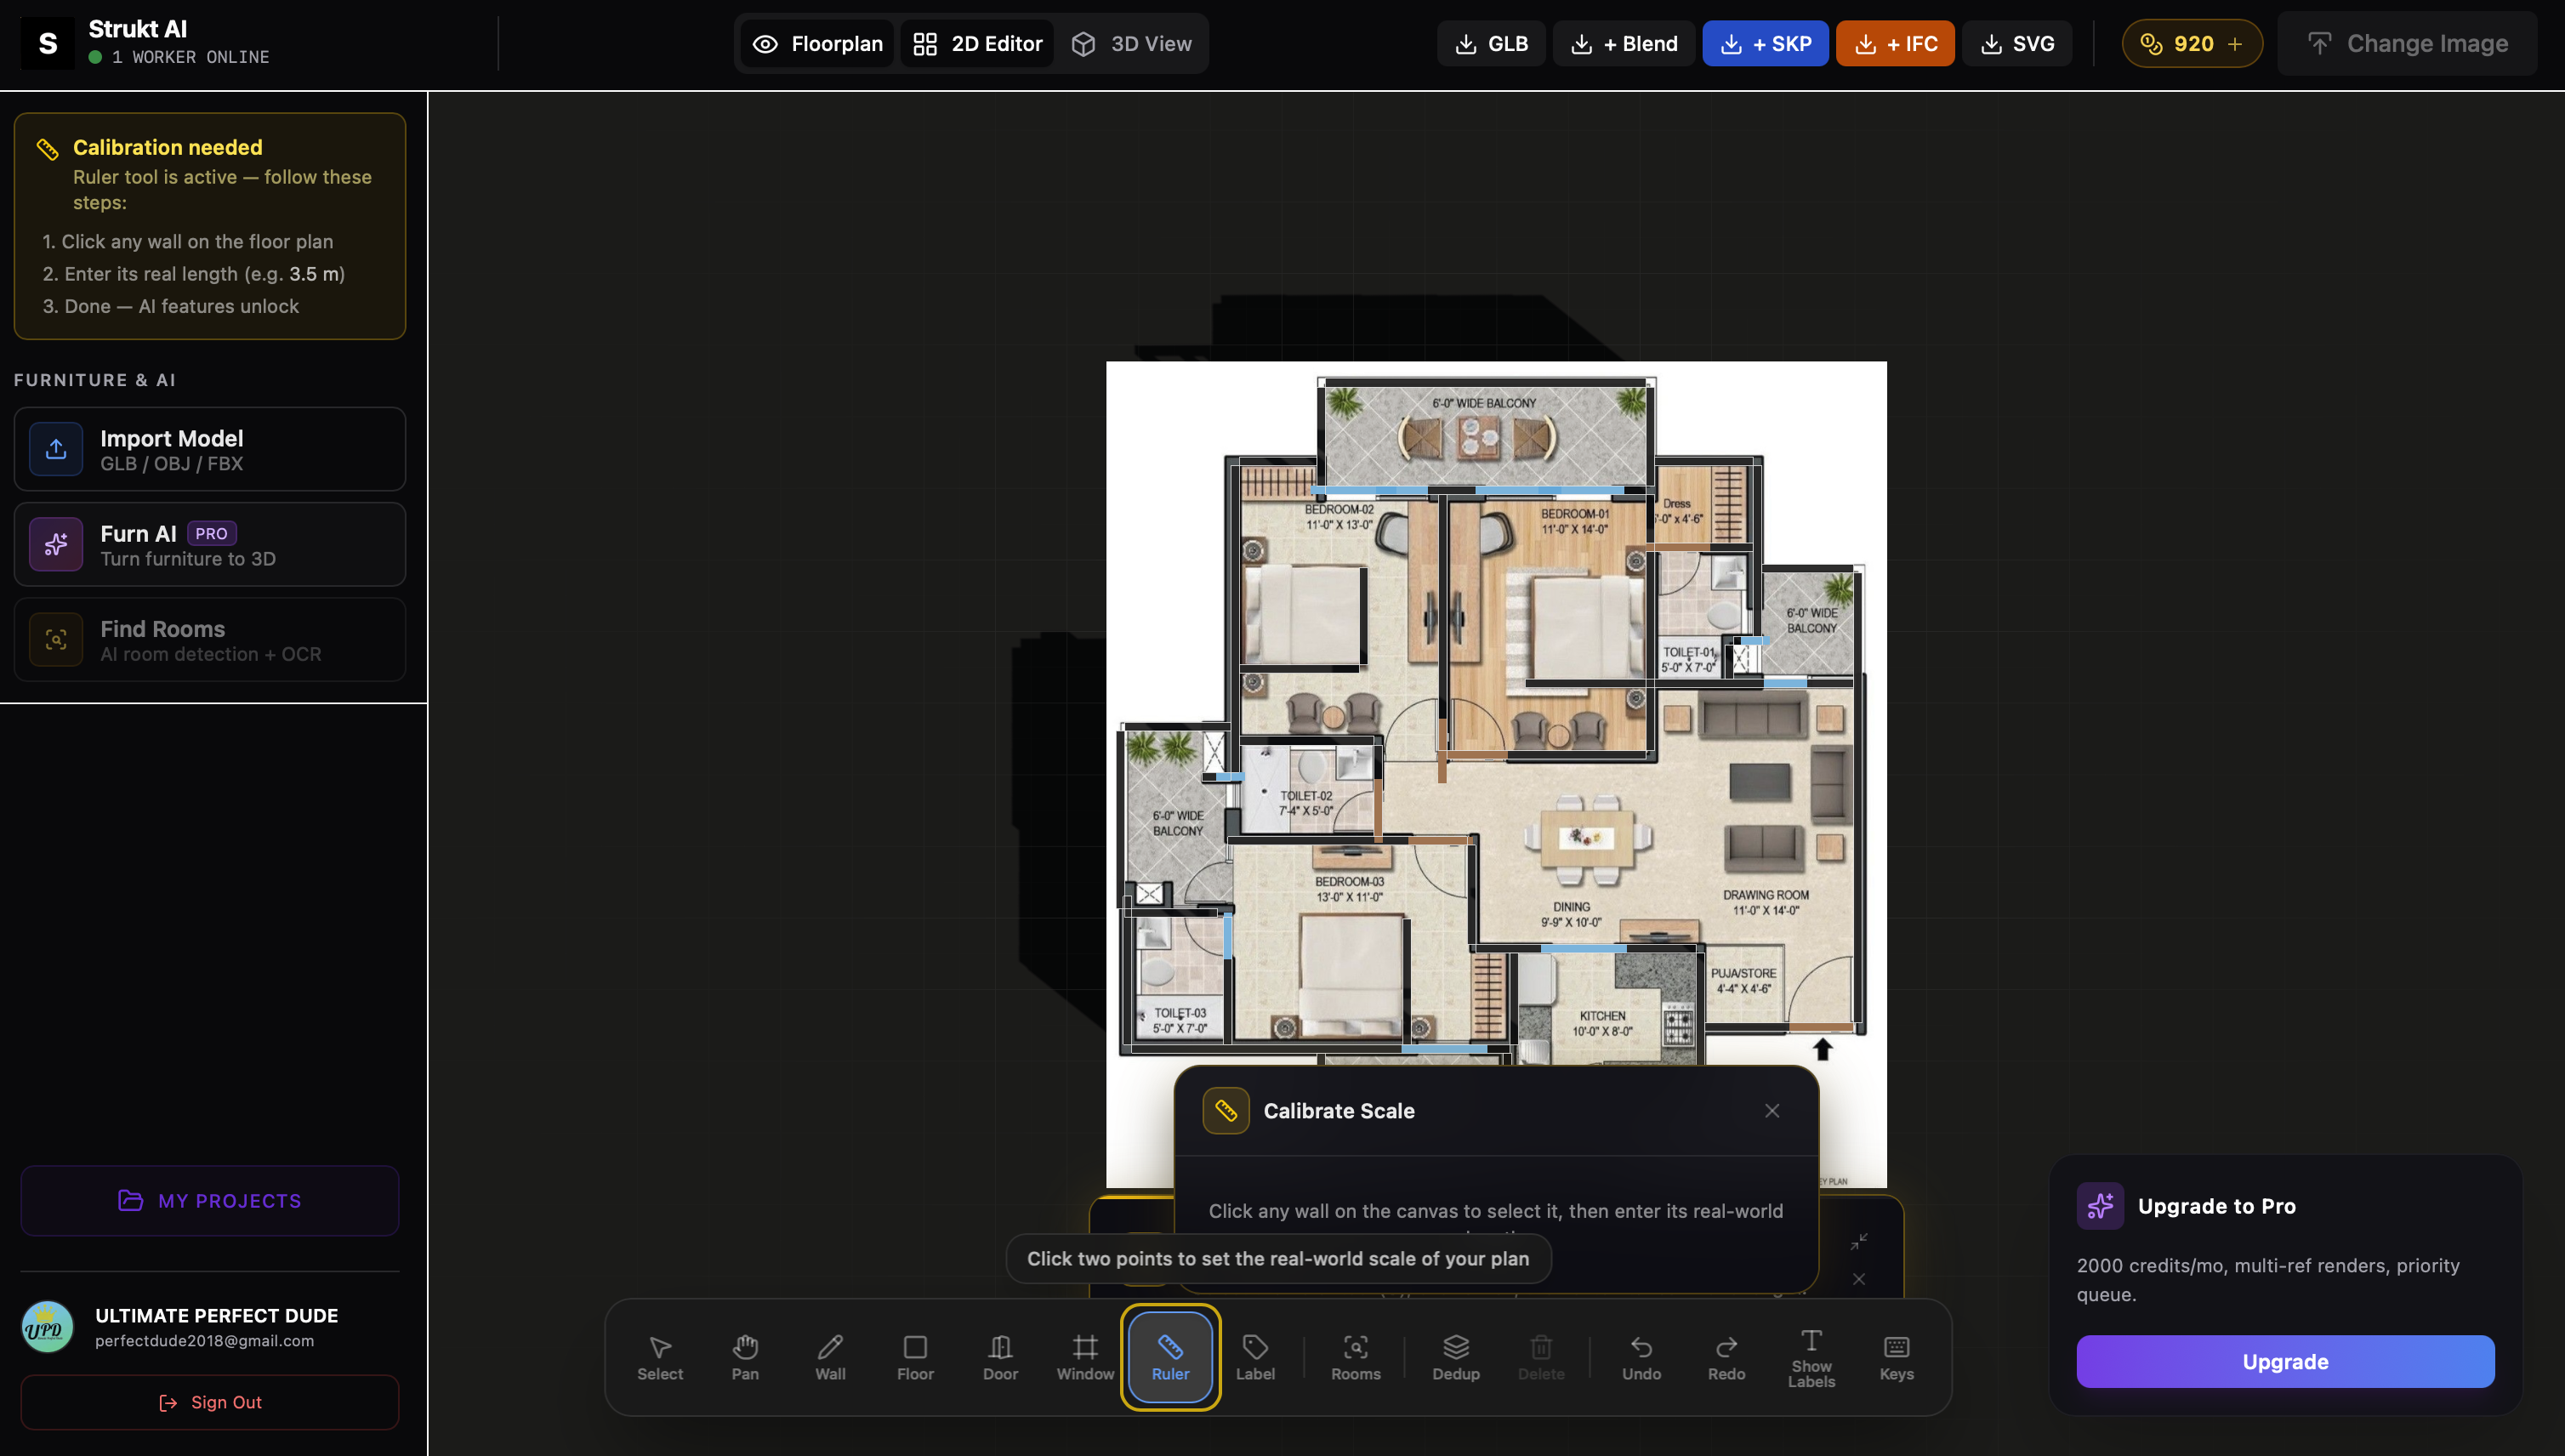
Calibrate Real-World Dimensions
Select the Ruler tool (C), click on any wall you know the real length of, and type the measurement. This sets the scale so all dimensions in the 3D model are accurate — room volumes, door sizes, ceiling heights, and export measurements will all match reality.
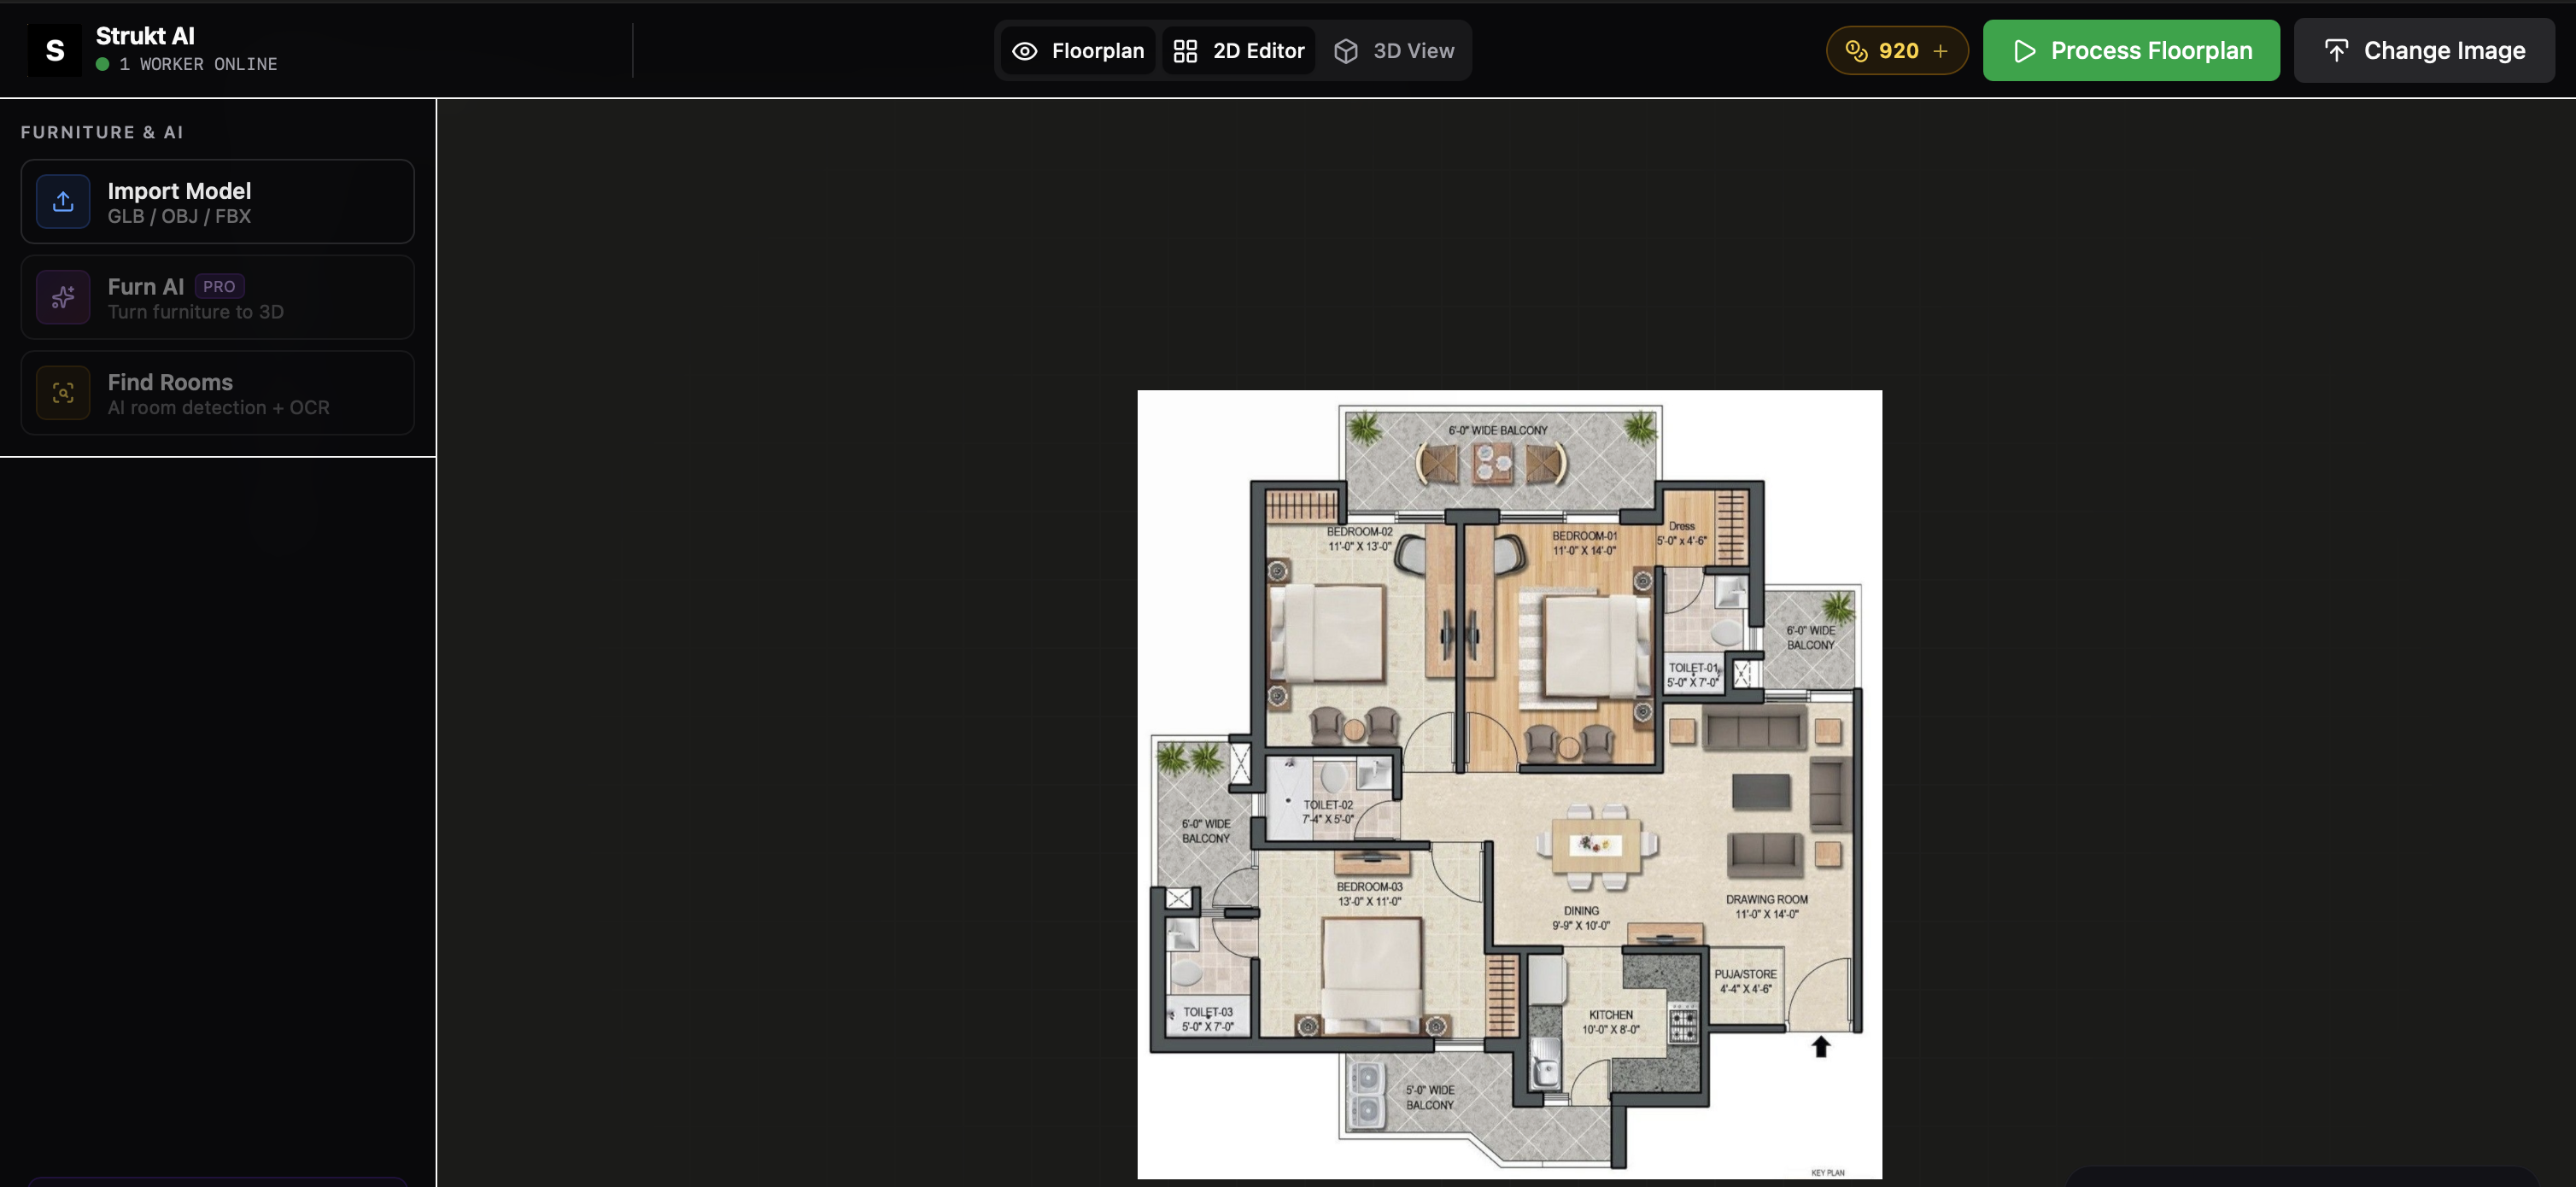
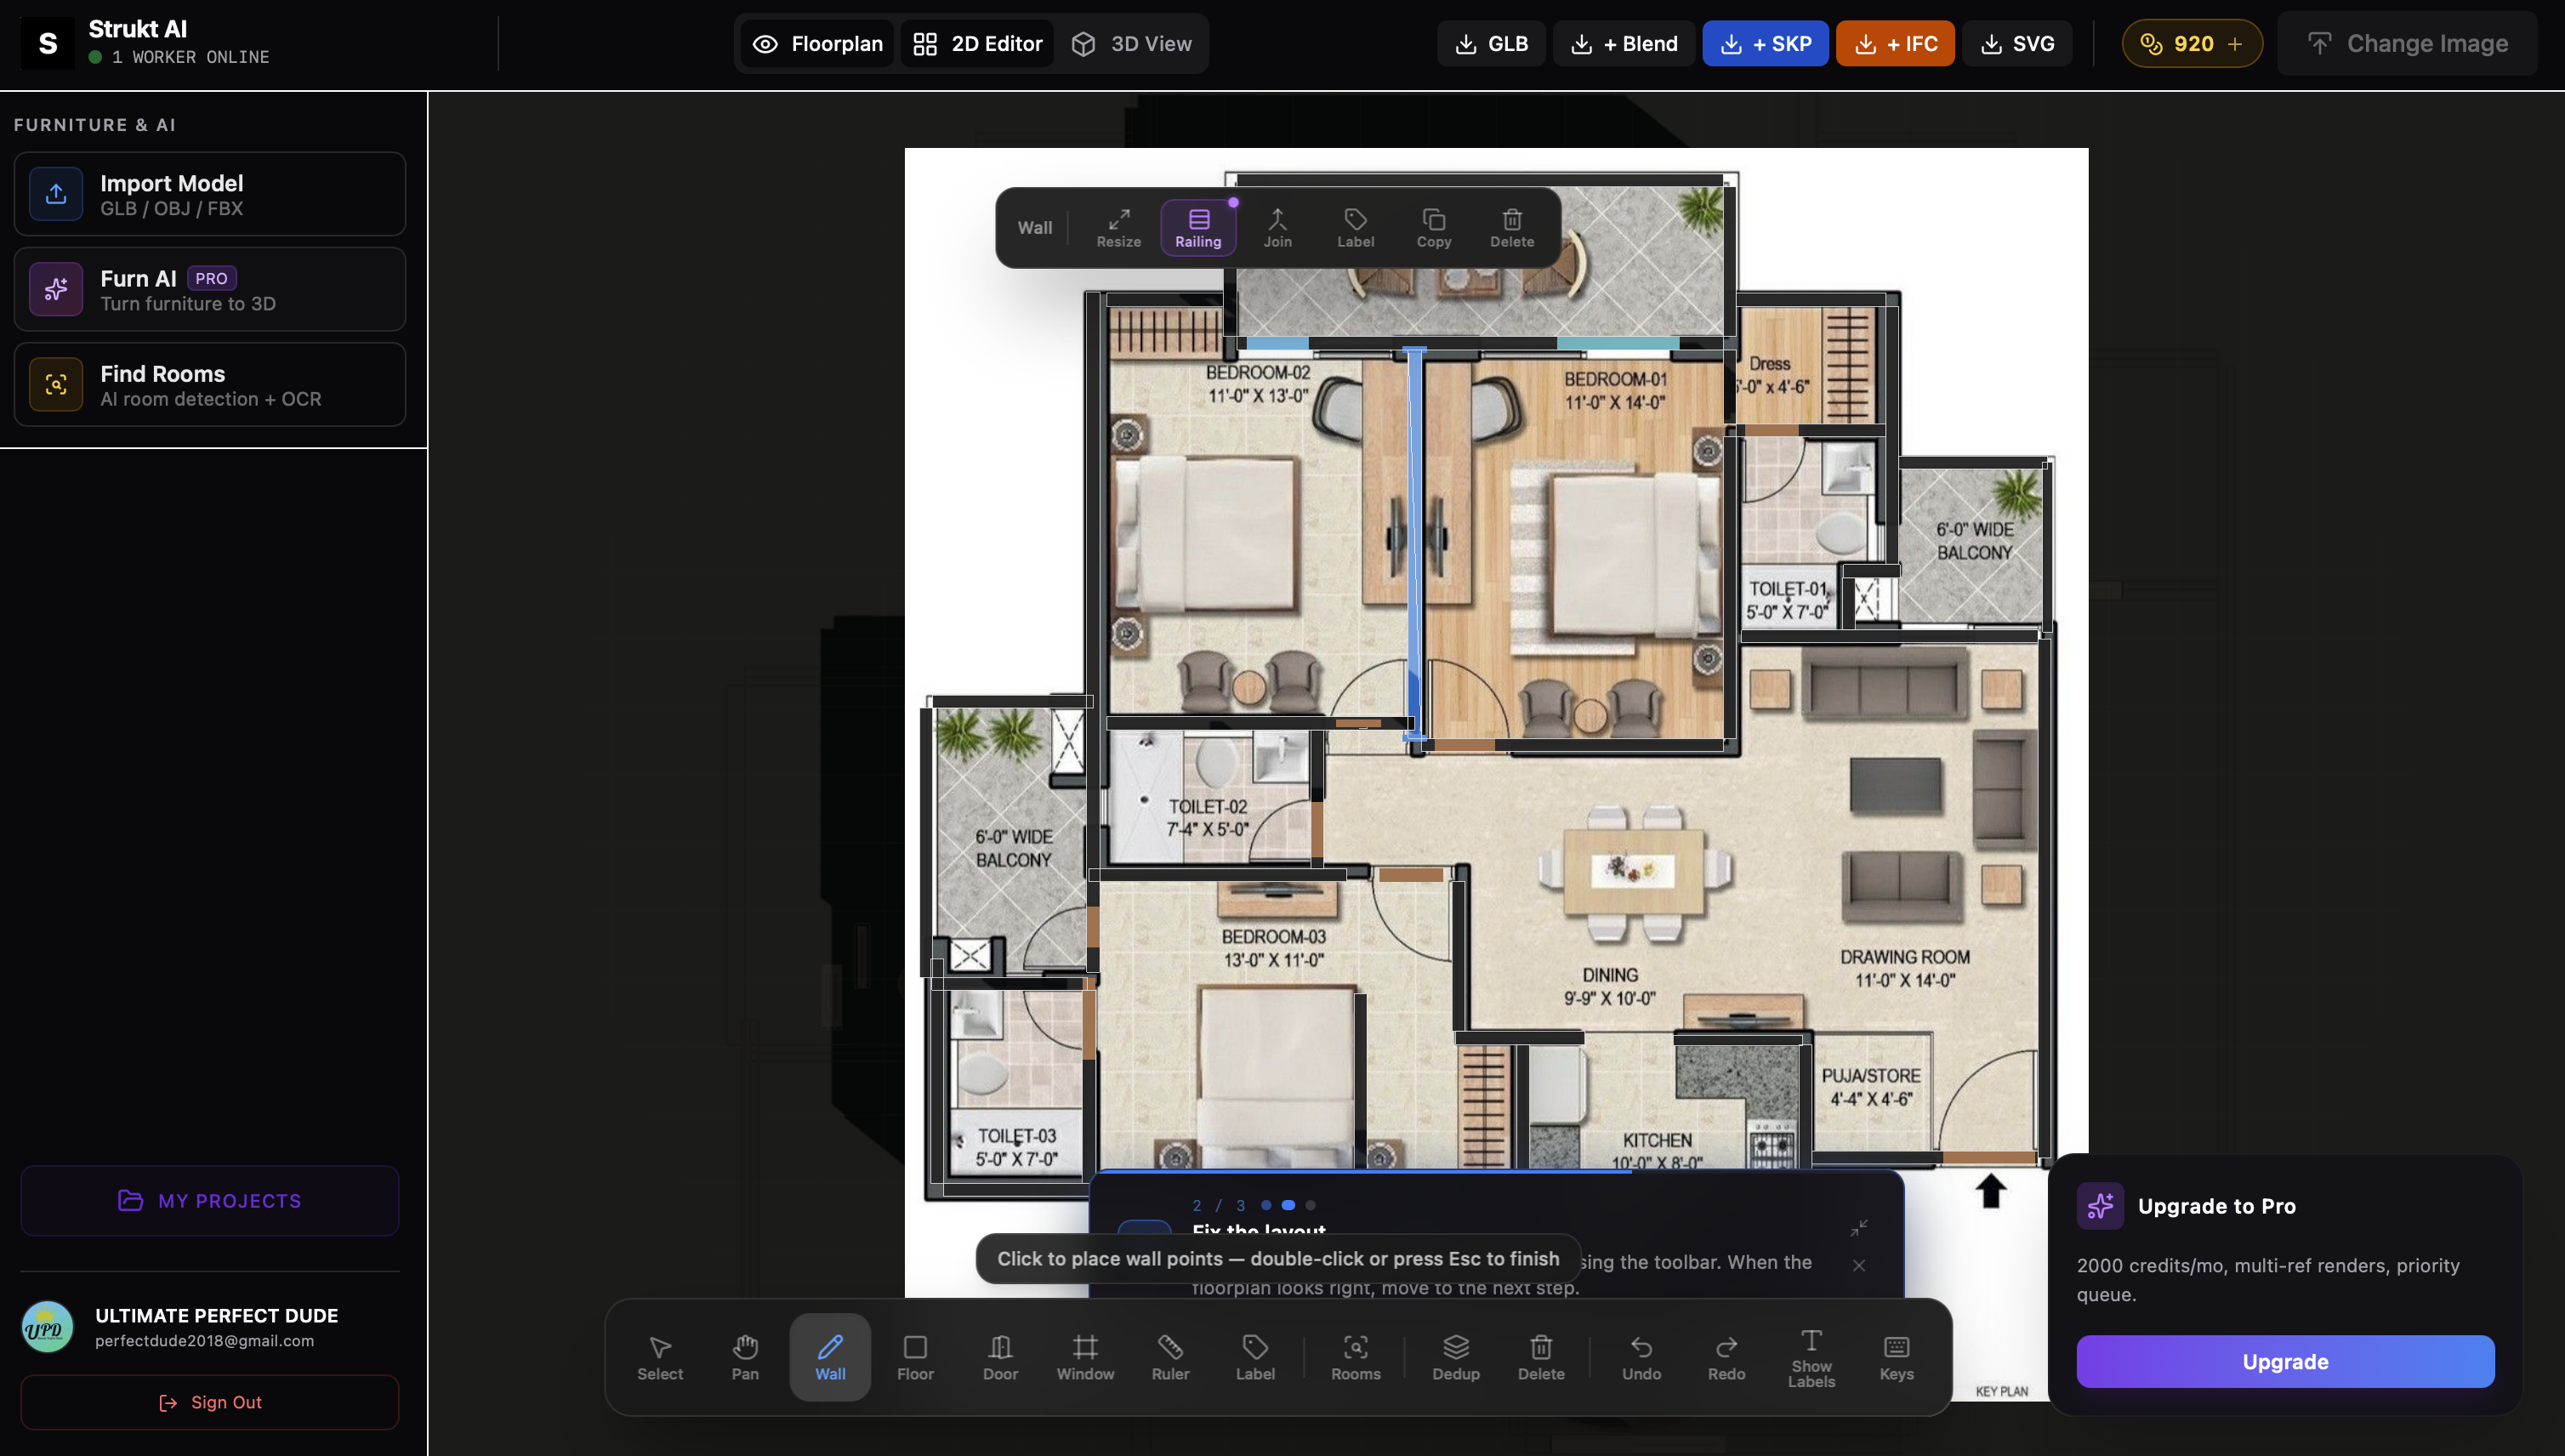
Edit Walls, Doors & Windows
Every element in the 2D editor is live. Click any wall, door, or window to select it — a context toolbar appears at the top with actions specific to what you picked. Drag to reposition, use the handles to resize, and cycle through door/window types with a single button.
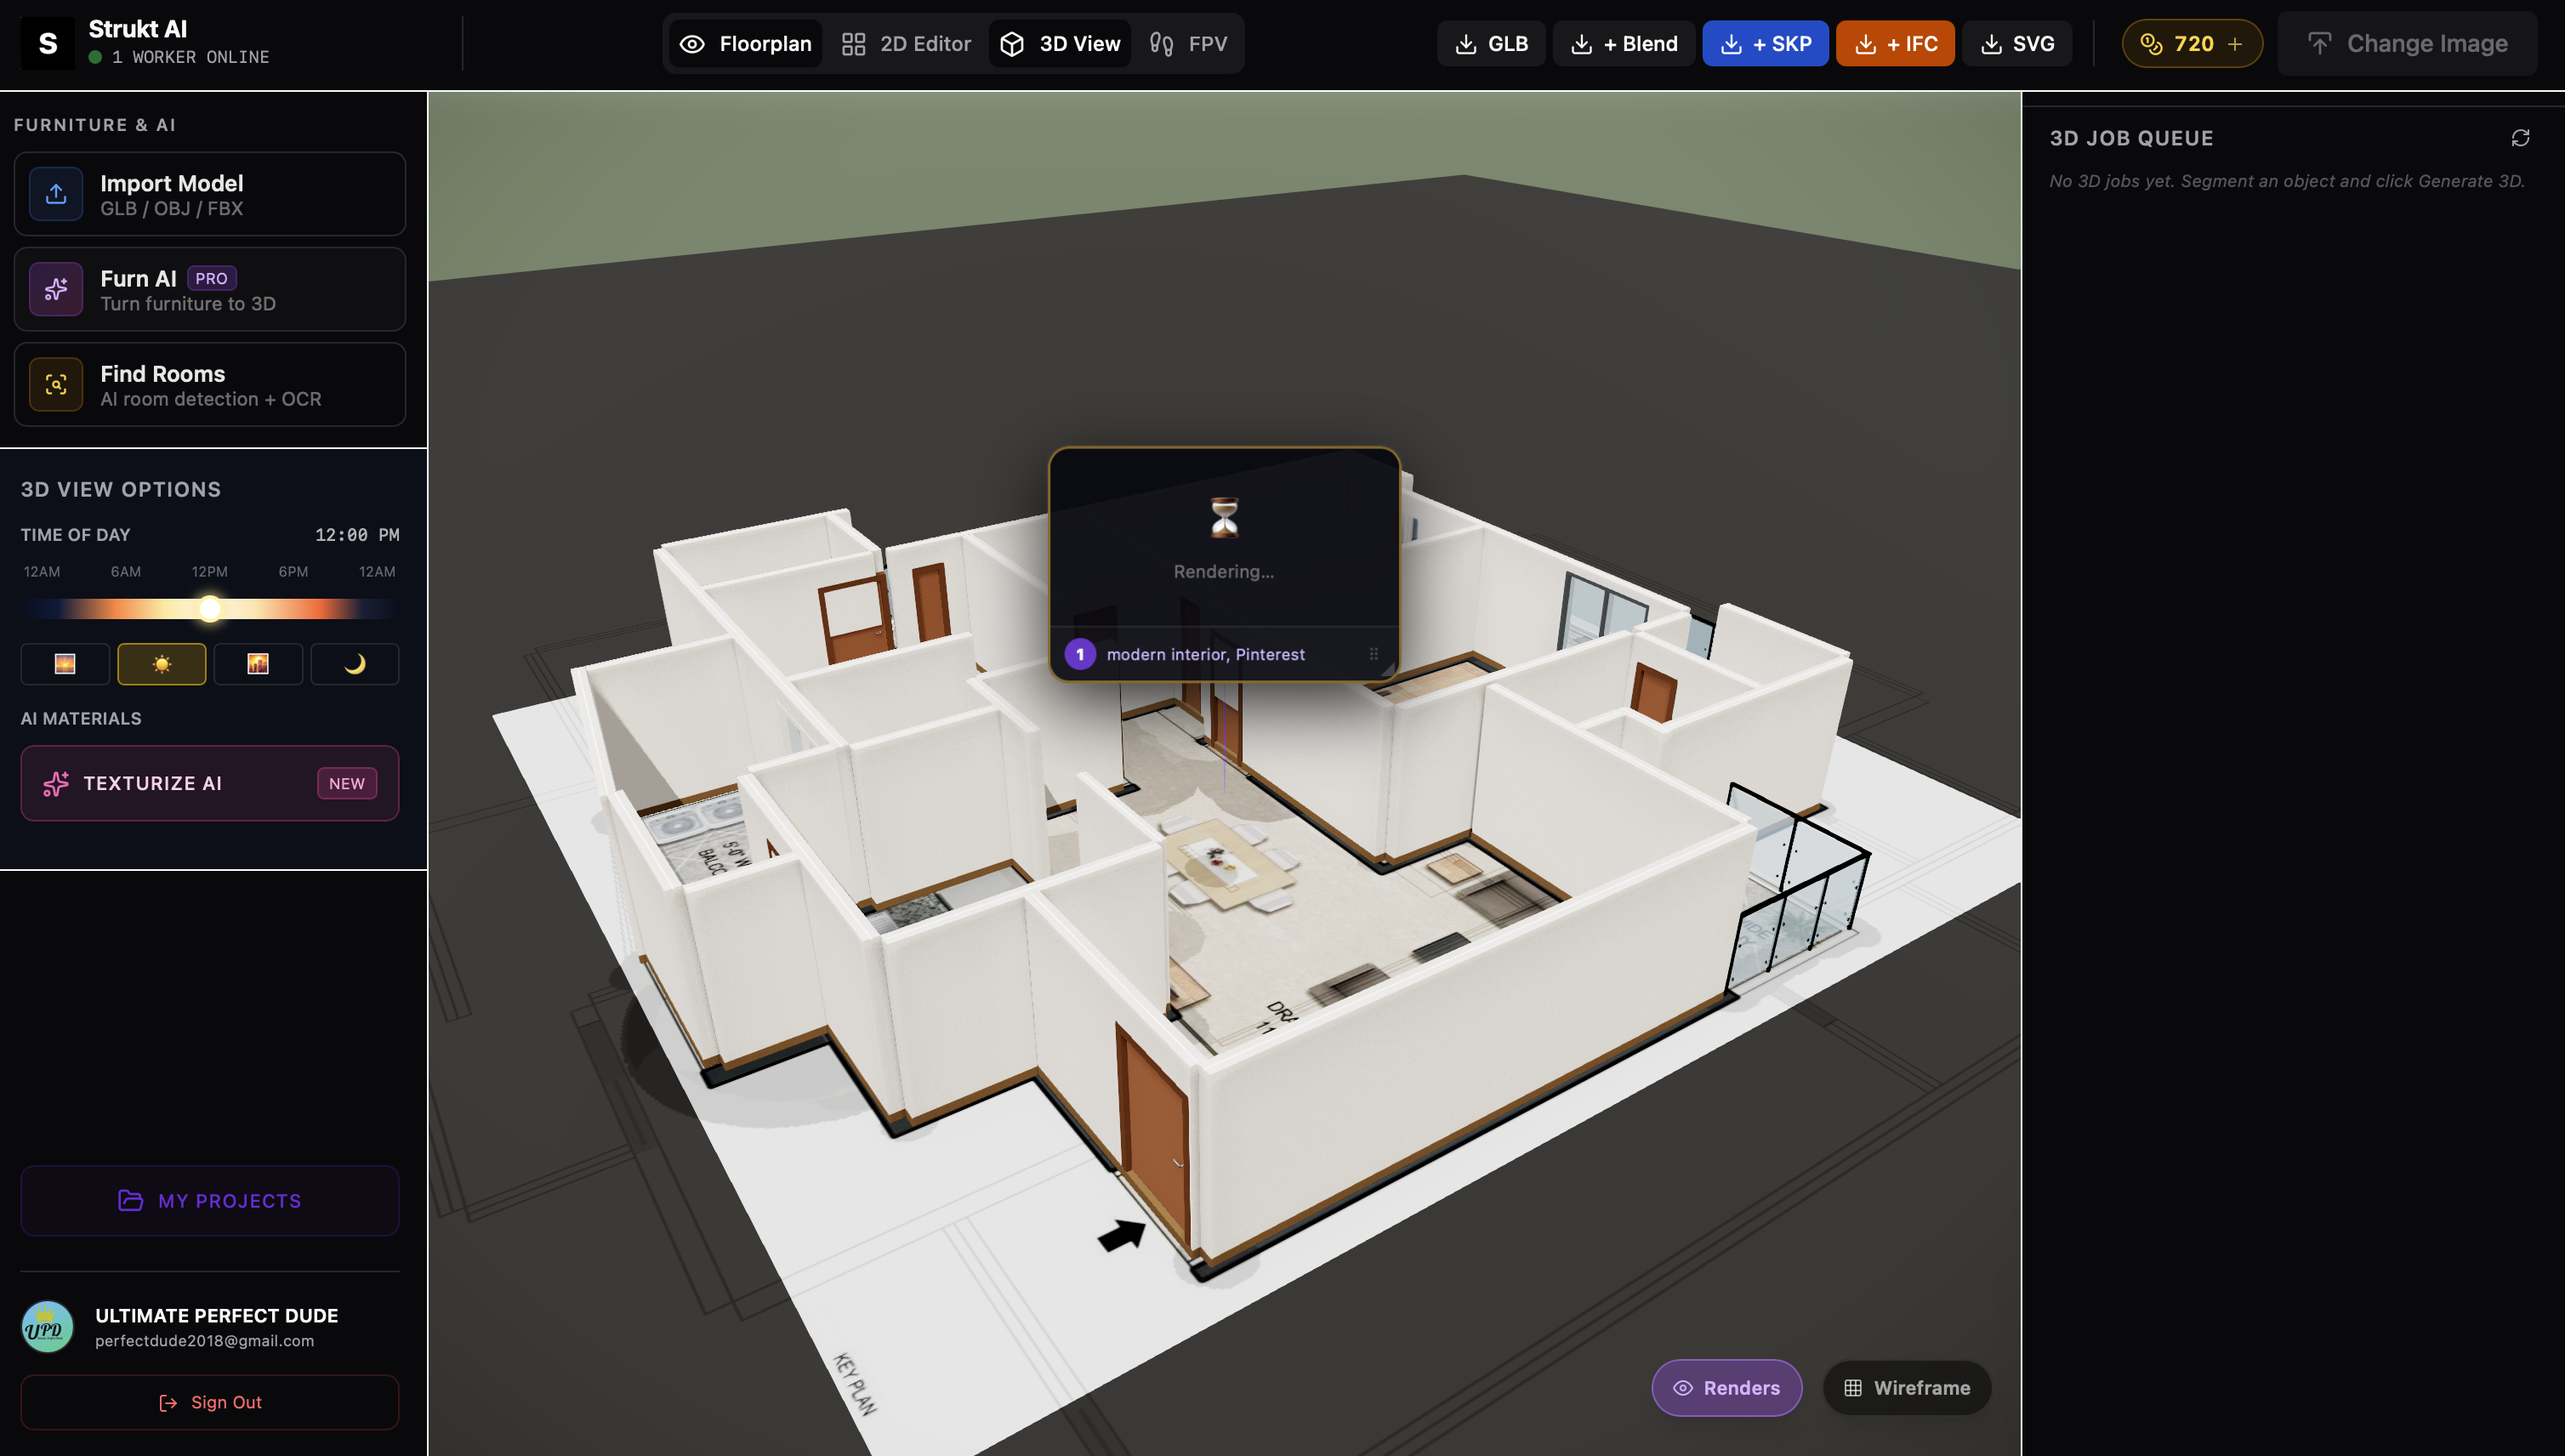
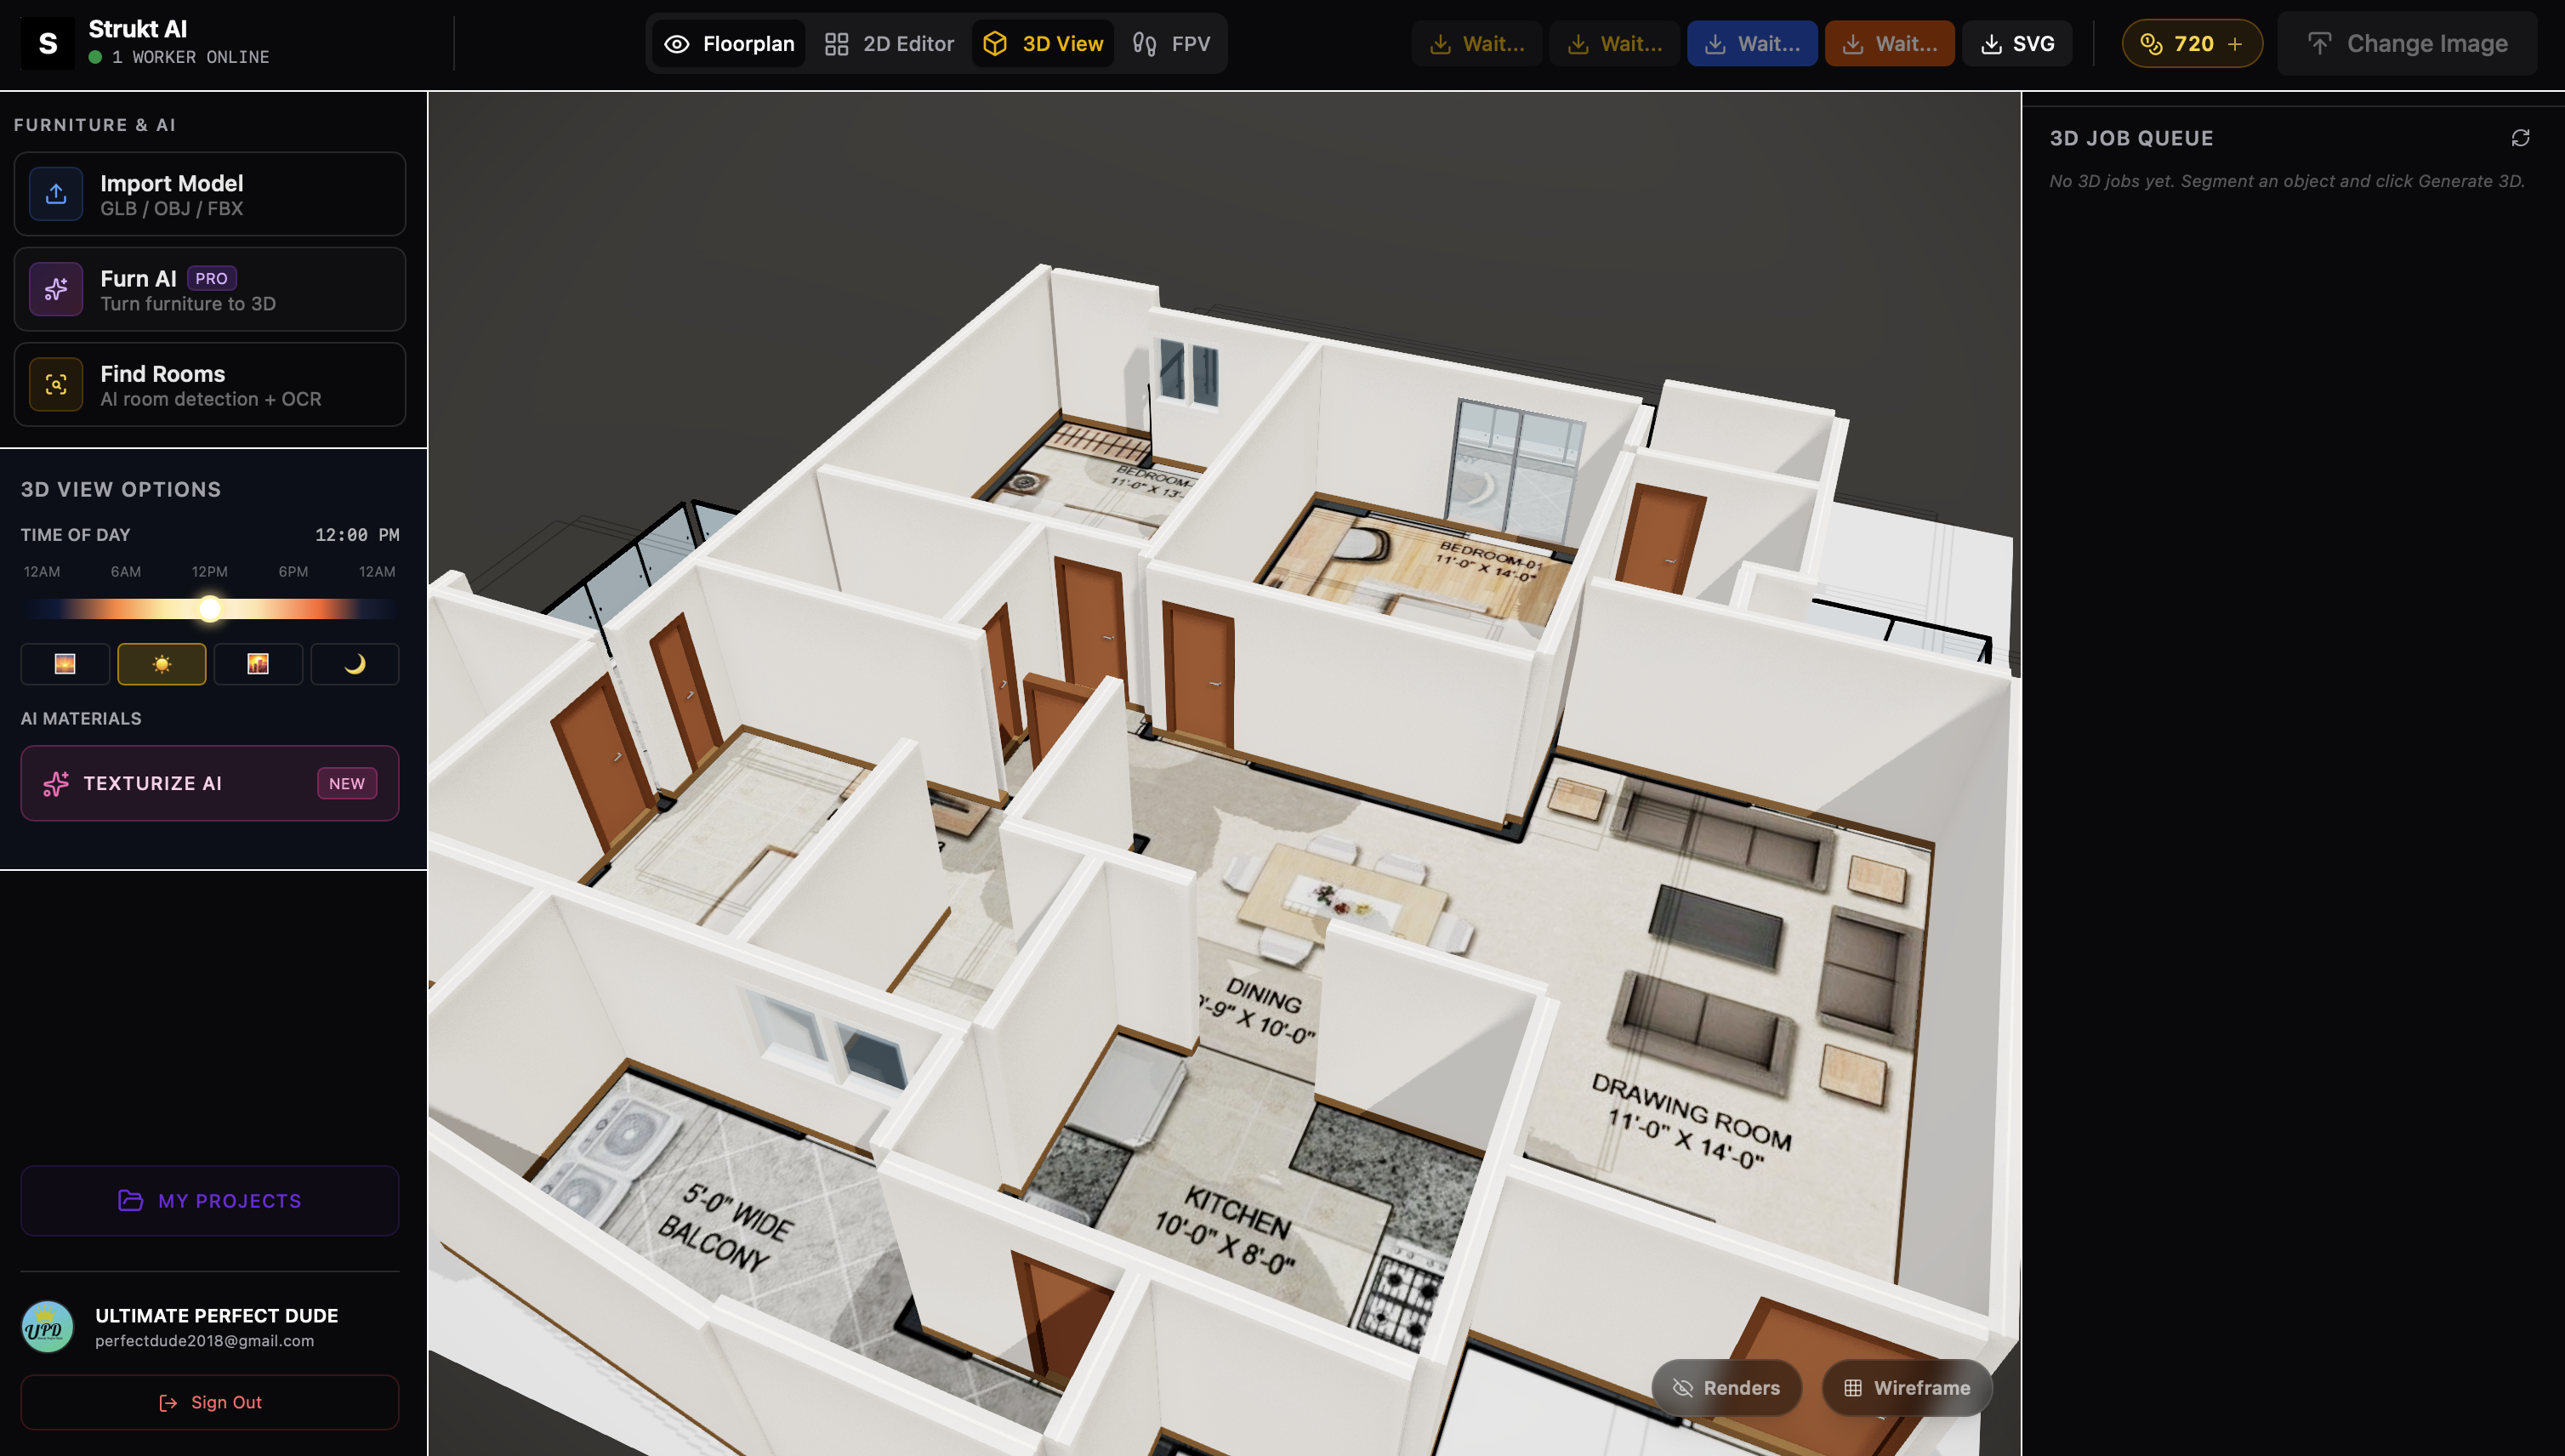
Switch to 3D View
Click the 3D button in the topbar to instantly extrude your 2D floor plan into a full 3D model. Walls, doors, windows, and railings all appear at their correct heights. Orbit around the model to inspect the structure from any angle before adding materials or rendering.
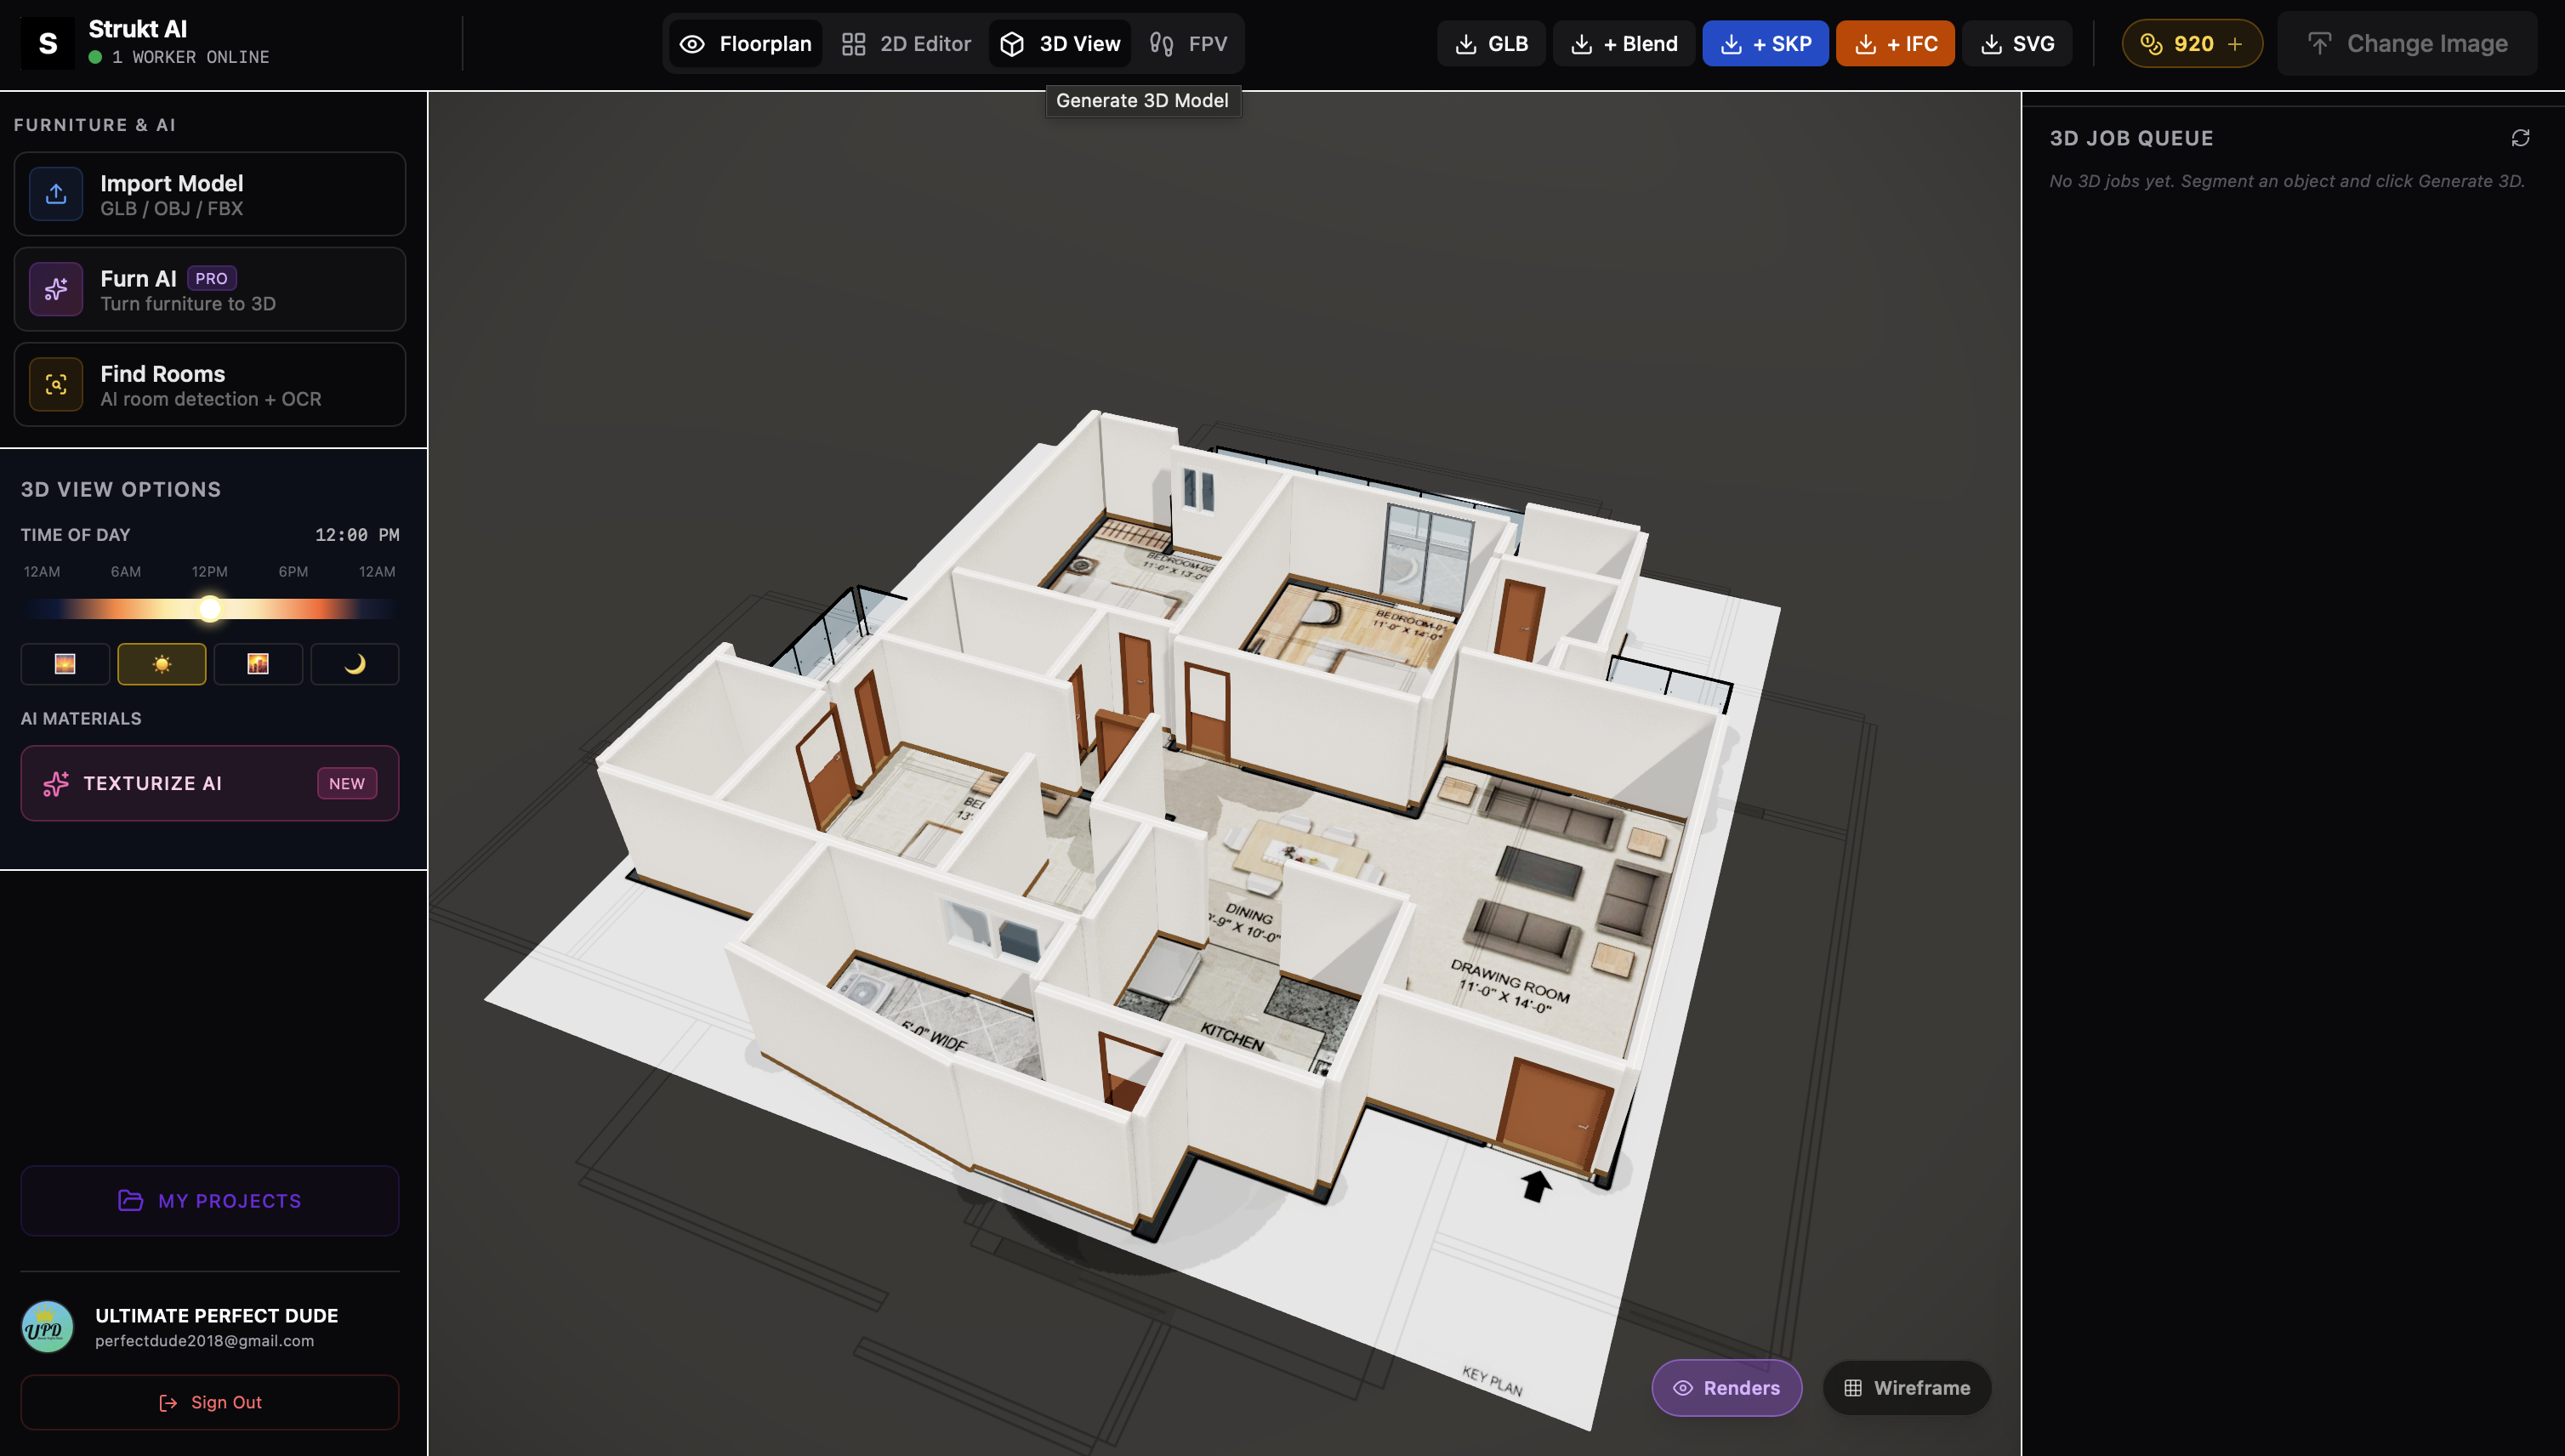
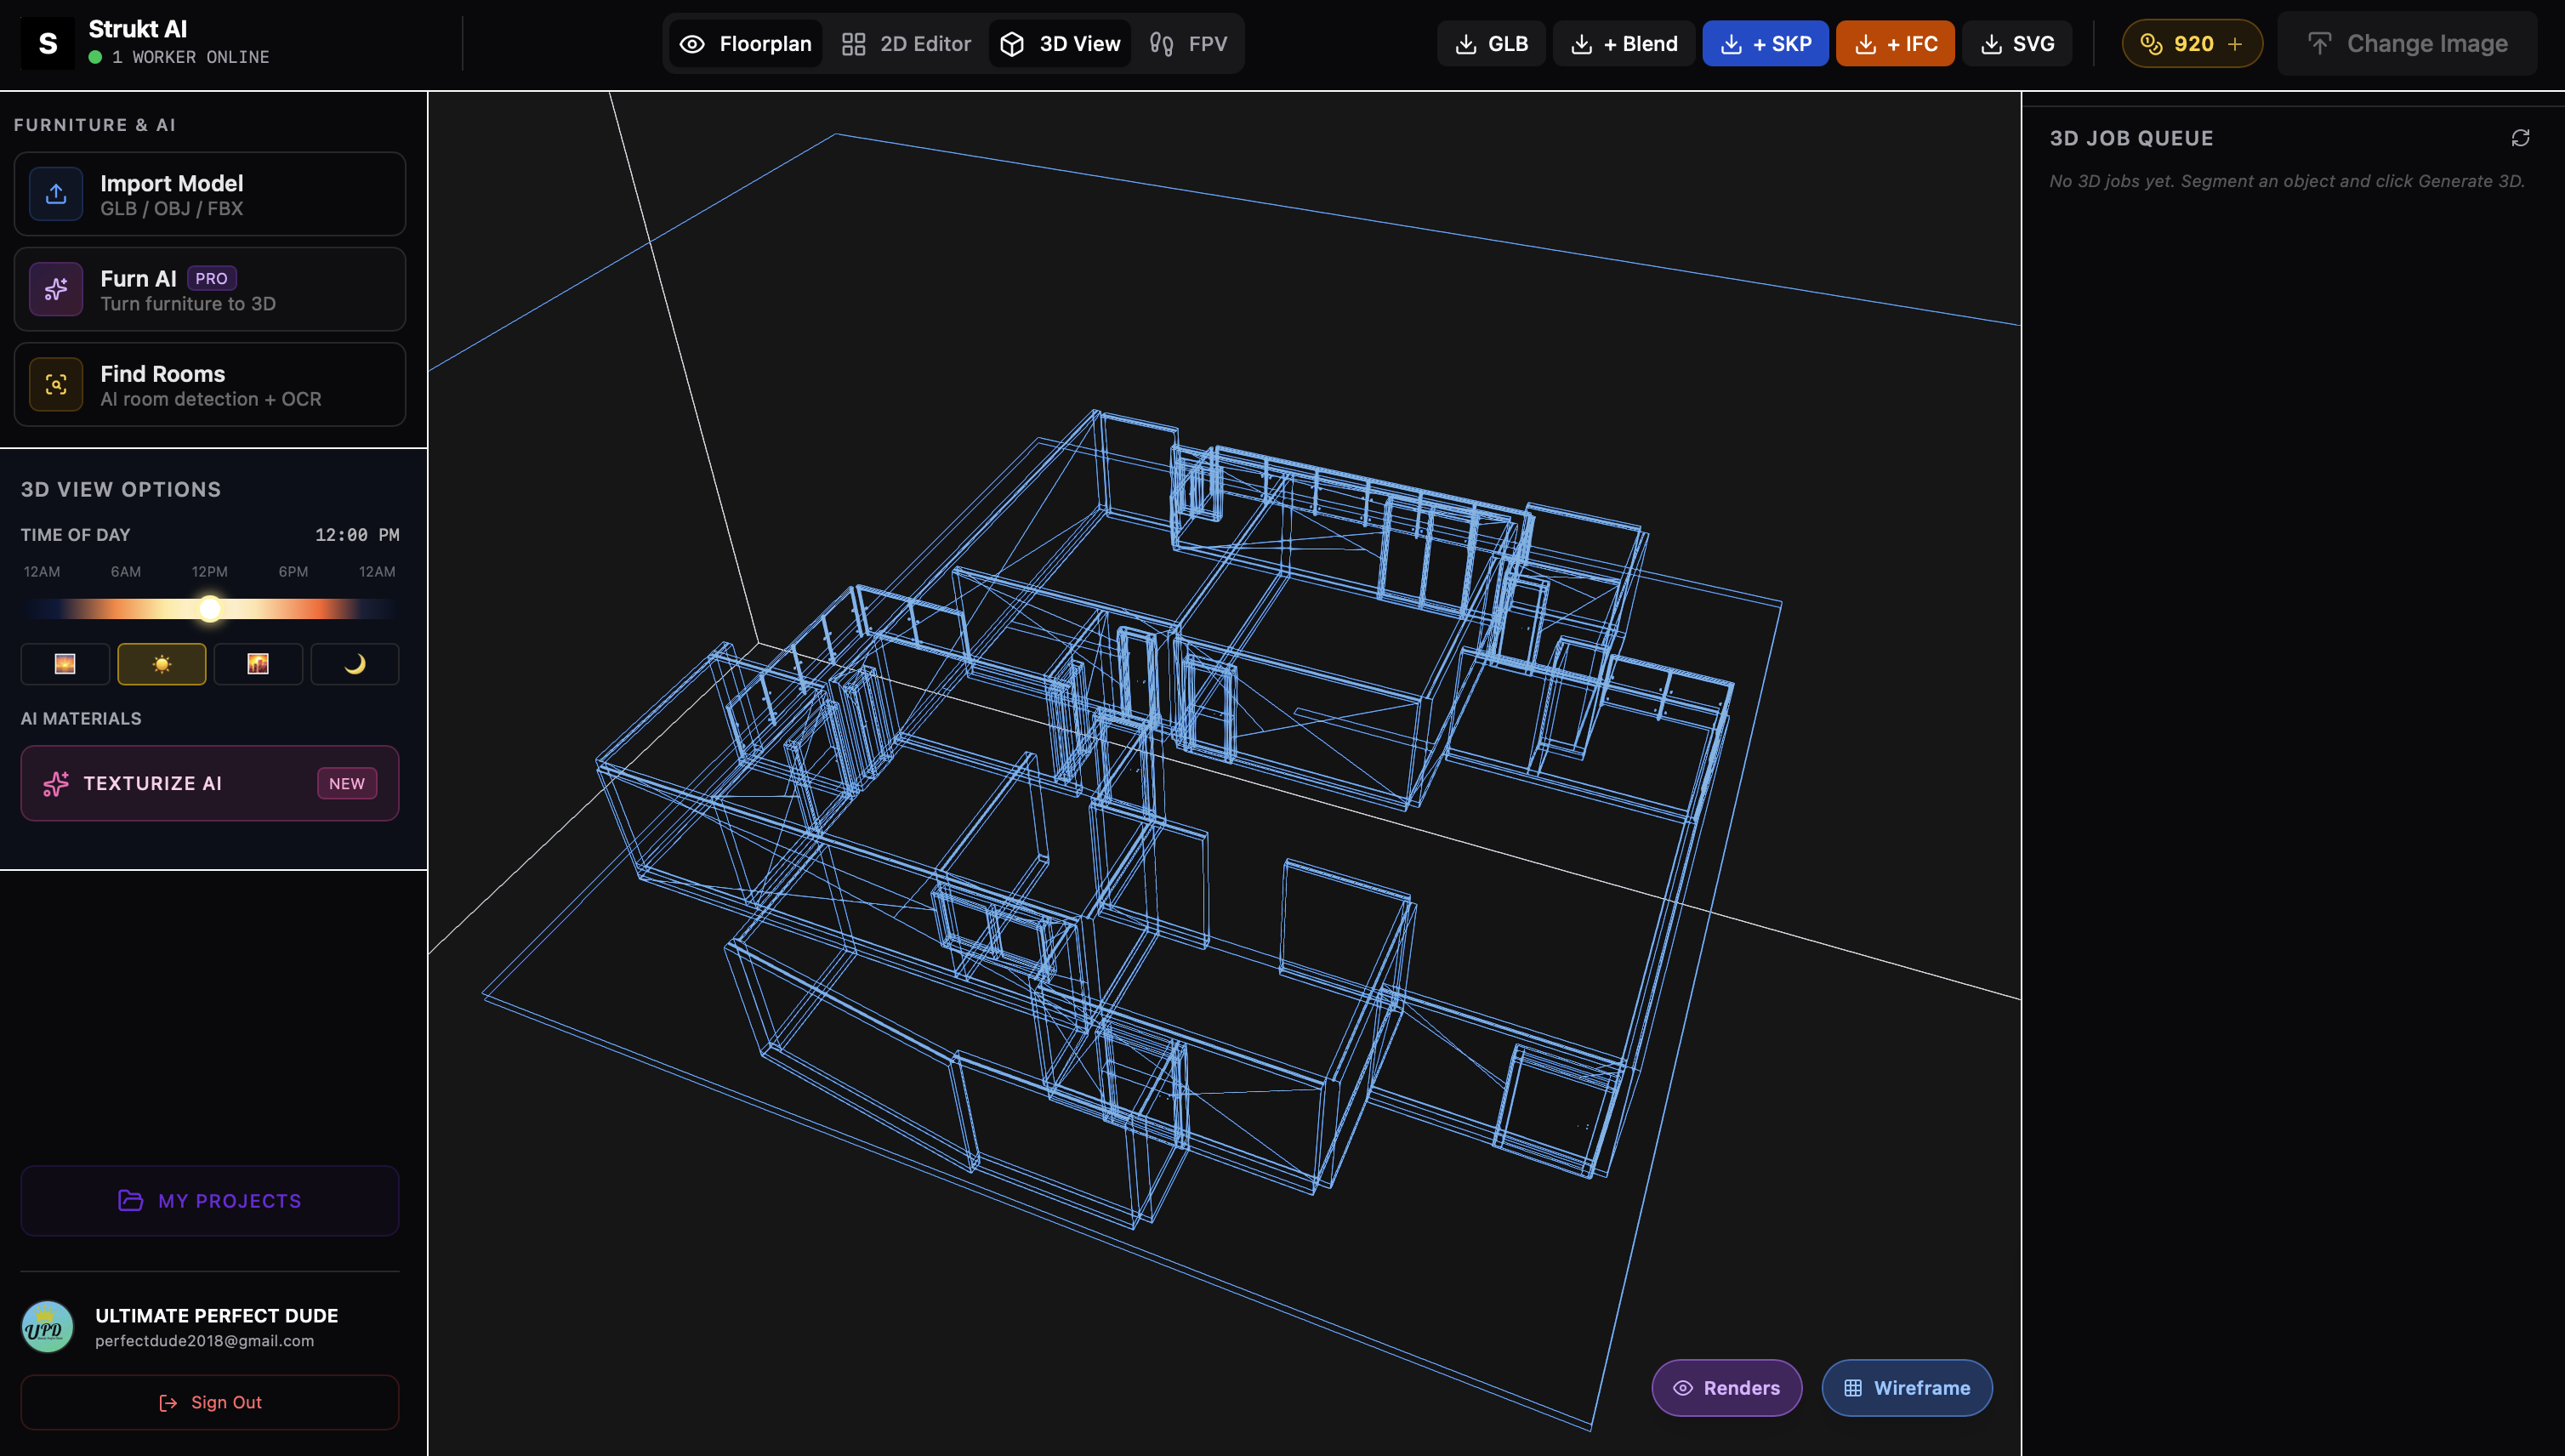
Use Wireframe Mode
Toggle the wireframe button to see the raw 3D geometry without materials. This is useful for checking wall thicknesses, verifying that all walls are correctly connected, and spotting any gaps or doubled geometry before you invest time in texturing and rendering.
Enable FPV — Walk the Space
Switch to First Person View (FPV) to walk through the space at eye level. This is the most powerful way to check ceiling heights, door widths, sight lines, and room proportions before anything is built. Navigate with WASD or arrow keys and look around with the mouse.
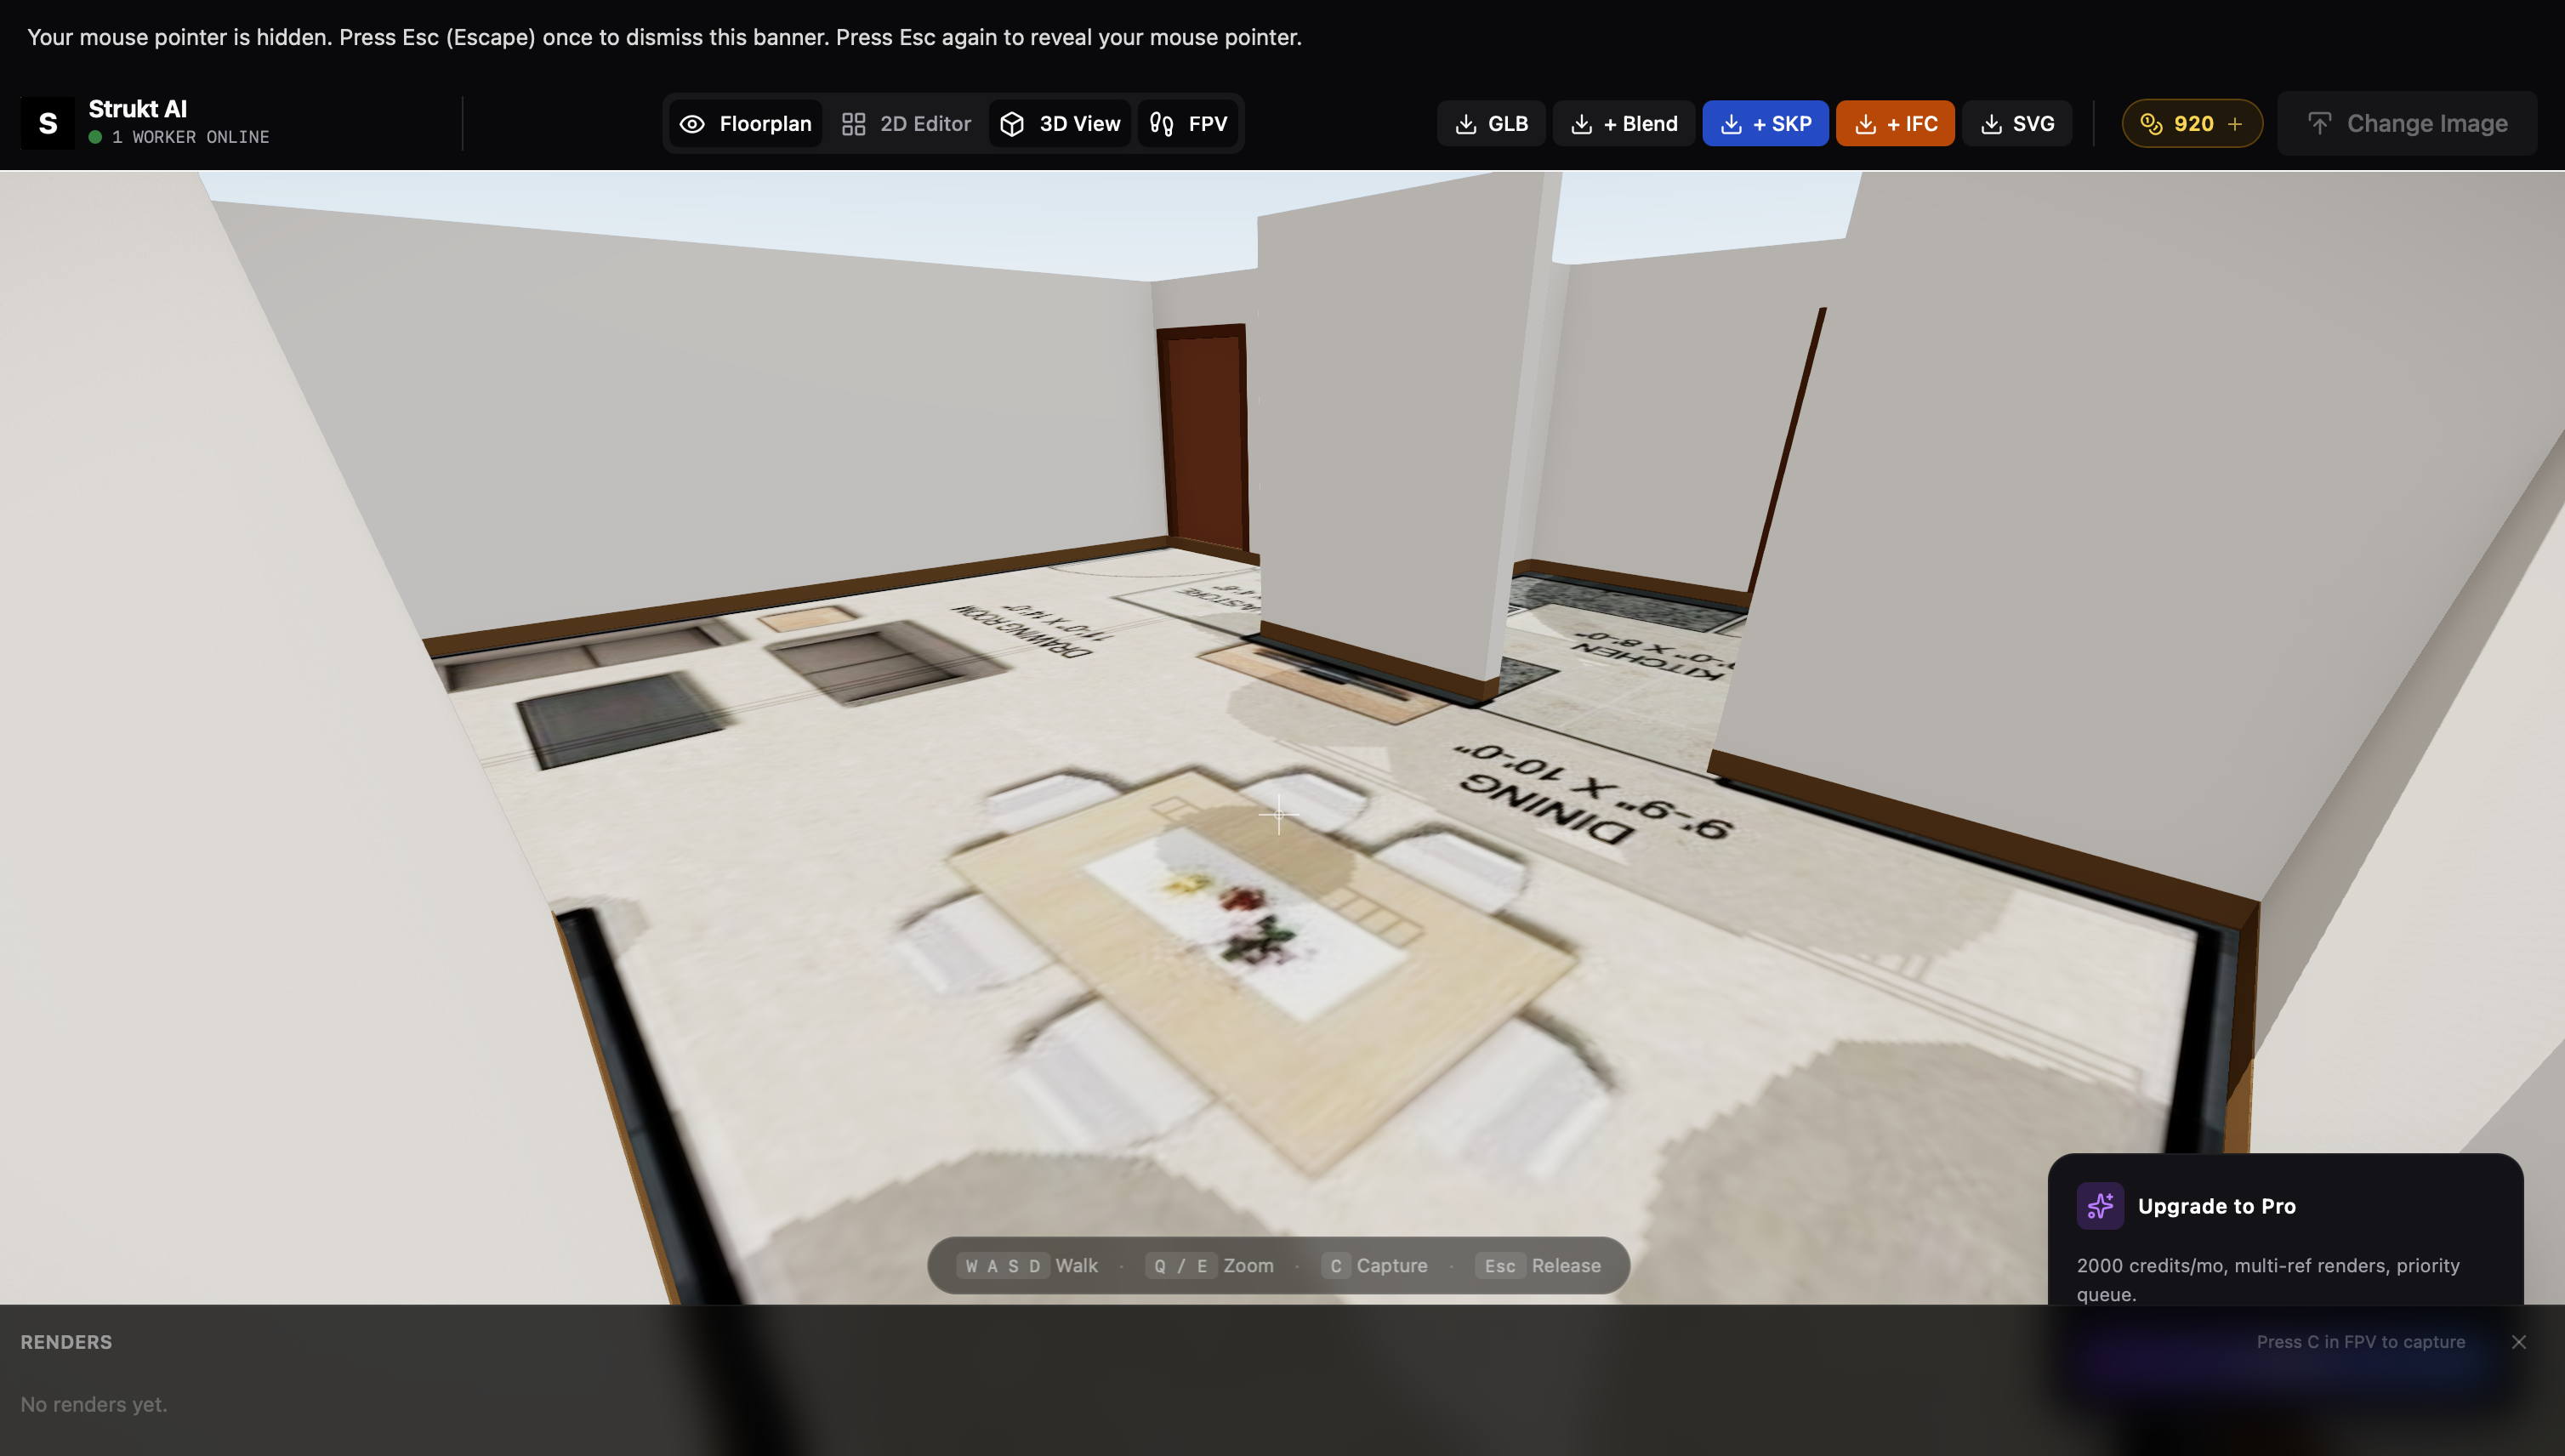
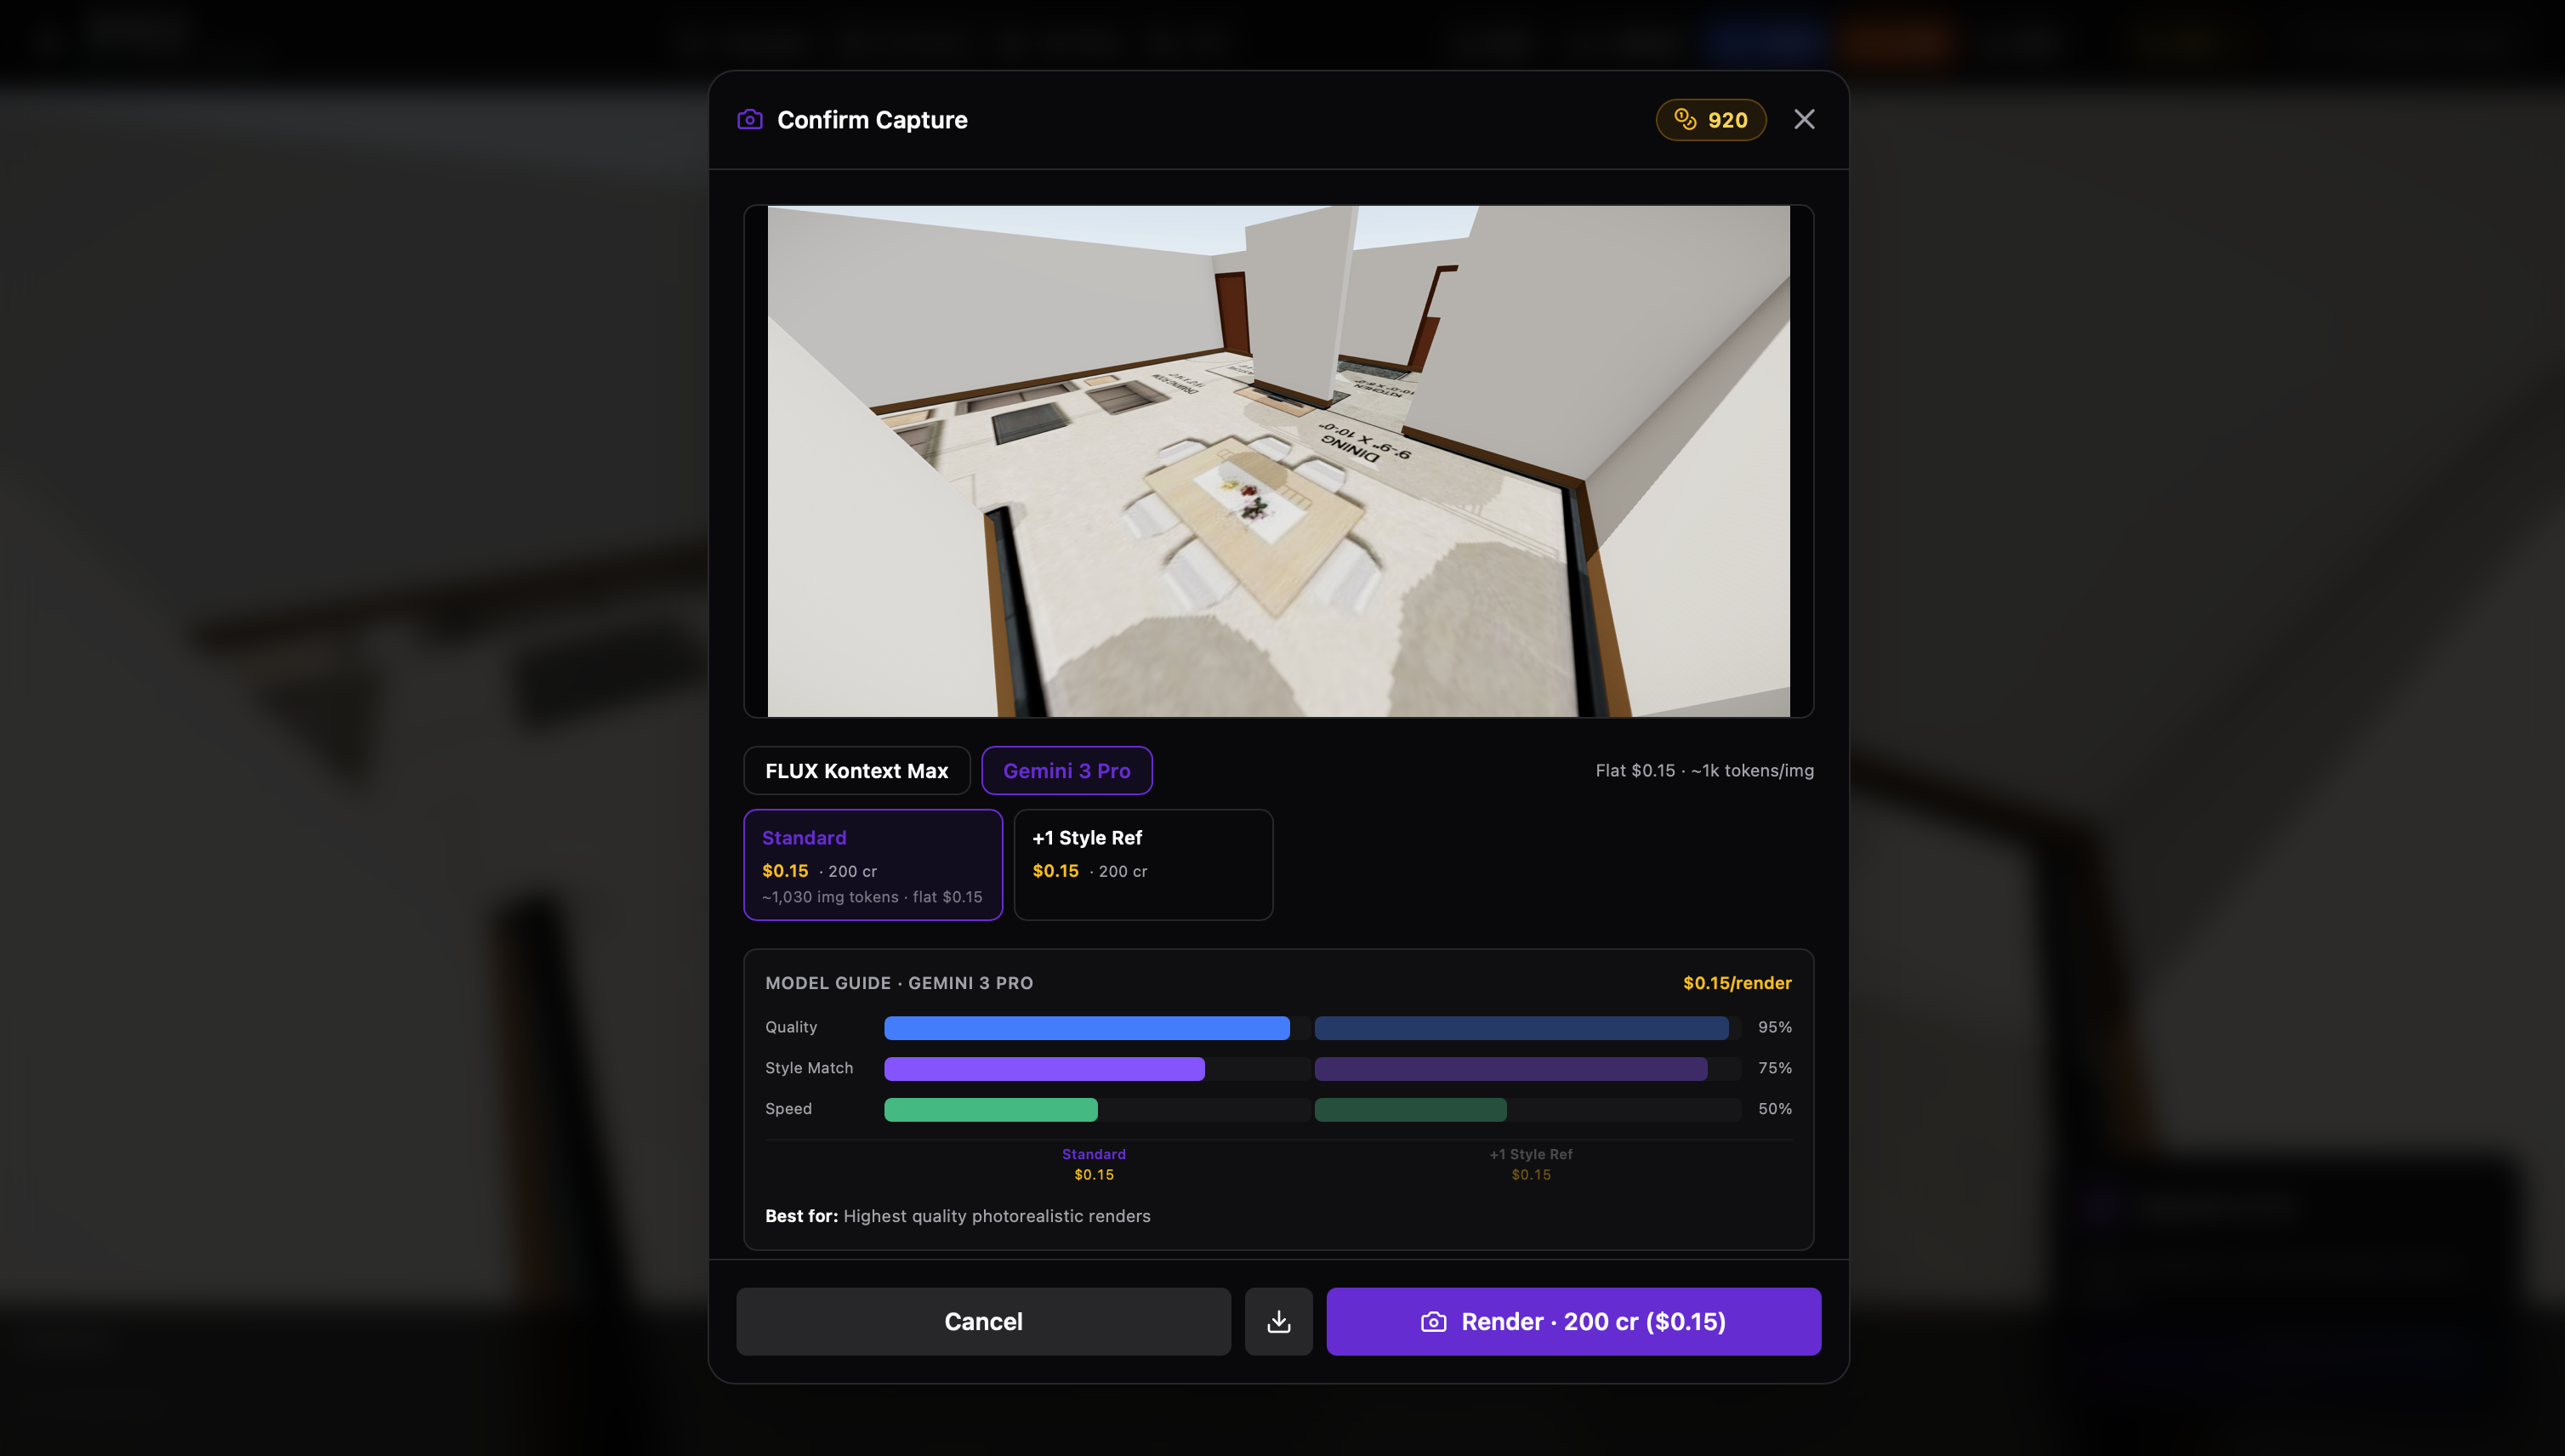
Capture & Render
Open the FPV Render panel, position your camera to the angle you want, and click Capture. Write a short prompt describing the style (e.g. 'modern minimalist living room, warm lighting, oak floors'). Optionally add 1–3 style reference images. Hit Generate to produce a photorealistic render.
View & Toggle Render in 3D
Once a render completes, you can overlay it on the 3D scene to see how the AI interpretation maps to the geometry. Toggle the render on and off to compare the photorealistic output against the raw 3D model. This helps you decide if you need to adjust camera angle or prompt.
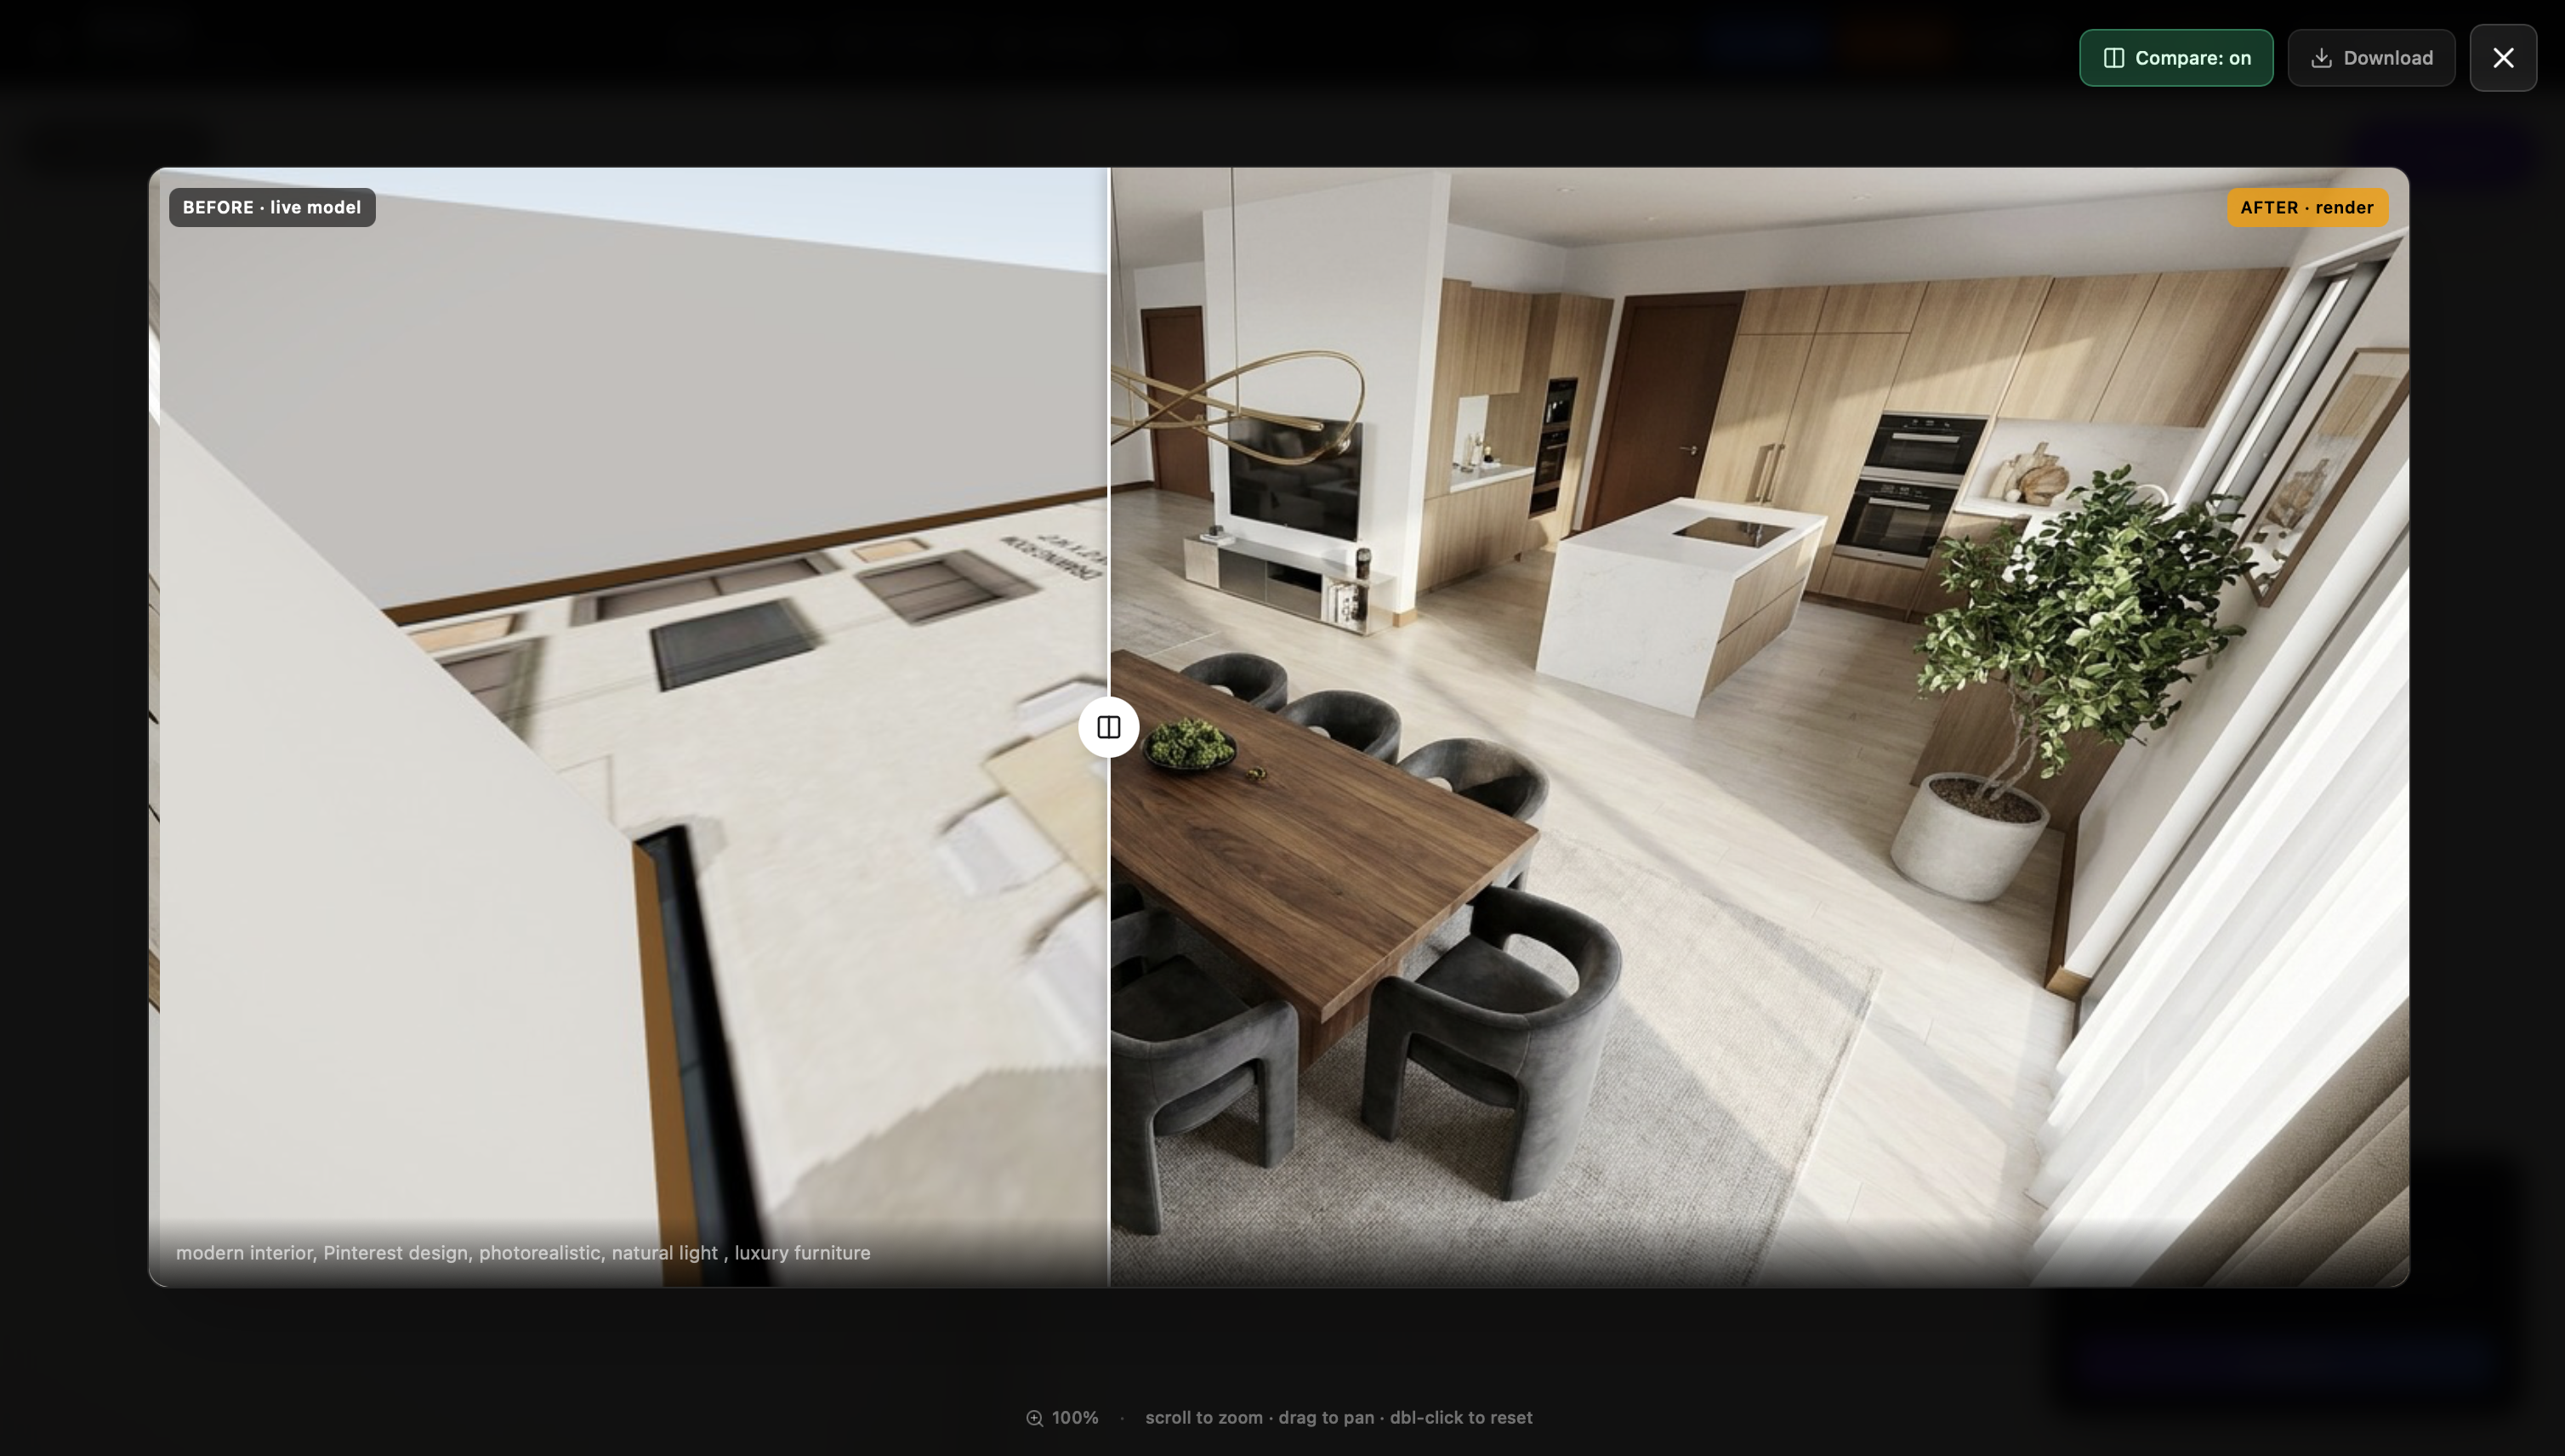
Compare Before & After
The compare slider in the render gallery lets you drag between the raw FPV screenshot (before) and the AI-rendered output (after). This is the clearest way to show clients the transformation — from a plain 3D model to a fully styled, photorealistic room.
Export in Any Format
Click the 3D Export button in the topbar to download the model in your preferred format. GLB works for web and most 3D tools, Blender (.blend) gives you the full scene graph, SketchUp (.dae / Collada) for design work, and Revit (.ifc) for BIM workflows. SVG exports the 2D vector for further editing.
Any photo.
Any furniture. 3D in seconds.
Upload a photo of any real furniture piece, click to select it, and FurnAI generates a 3D GLB model you can place directly into your floor plan.
Open FurnAI
Click the Sparkles icon in the left sidebar to open the FurnAI panel.
- Look for the ✦ sparkle icon in the sidebar
- FurnAI is a Pro feature — 70 credits per generated model
- Credits are only charged when you click Generate, not on upload
Upload a Reference Photo
Drop in any photo of the furniture piece — room shot, catalogue scan, or phone photo. Any angle, any background.
- PNG, JPEG, or WEBP — up to 50 MB
- Any angle works: front, side, three-quarter
- The background doesn't matter — you'll mask it out next
Click to Select the Object
With Include mode active (green +), click on the furniture. SAM 2 instantly draws a mask around it. Add more clicks to refine.
- Click once on the centre for a quick first mask
- Add more clicks to extend coverage to corners and edges
- Use Brush Size to expand each click into a larger area
Exclude Background Areas
Switch to Exclude mode (red −) and click any parts that leaked into the mask — floor, wall, shadow, adjacent furniture.
- Toggle between Include and Exclude in the right panel
- Undo the last click with the rotate-left button, or Clear all
- You have up to 8 preview attempts per session
Label and Save
Type a name (e.g. 'Sofa') and press Enter. The labelled item is added to the list. You can select a second object from the same photo.
- Multiple objects from one photo = multiple 3D models in one job
- Each label gets its own colour-coded mask overlay
- Labels are for your reference only — they don't affect the 3D output
Generate the 3D Model
Click Generate 3D · 70cr. The job queues on fal.ai — you'll see live progress in the Assets panel. Most models finish in under 2 minutes.
- You can close the panel — generation runs in the background
- Queue position is shown if workers are busy
- Credits are automatically refunded if generation fails
Preview the GLB
When ready, the model appears in the Furn AI Assets panel. Expand it to see a rotating 3D preview. Download the raw GLB if needed.
- PBR materials are baked into the GLB
- Orbit with your mouse to check all angles
- Download the GLB file with the download button
Place in Scene
Click + Scene to drop the model into your 3D floor plan. The app switches to 3D mode. Use the transform handles to position, rotate, and scale.
- The model lands at the scene origin — drag it into position
- Use the transform gizmo to rotate and scale
- Multiple FurnAI models can live in the same scene
Ready to build?
Free to start. No credit card. Upload any floor plan and see the 3D model in under a minute.
Start Building — Free